
Welcome back, folks.
For Technical Tip #2, I’m going to show you one of the more useful Photoshop functions when it comes to improving an image: the “Shadows/Highlights…” command.
Using this (and in only two steps) you’ll be able to change a photo from good to great.
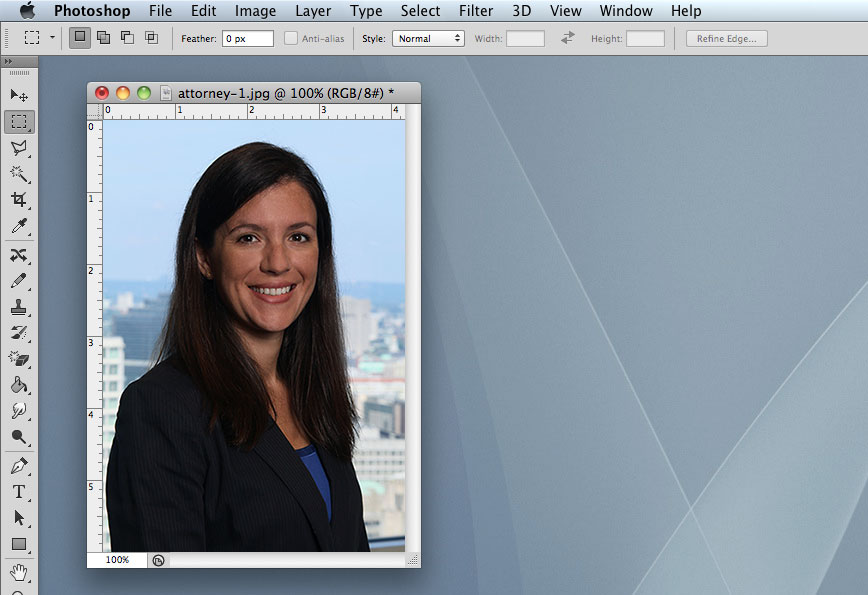
I’ve found that the Shadows/Highlights command is frequently useful when it comes to images of people – their clothing and hair in particular.
So let’s use this image as our example:
Click to view larger.
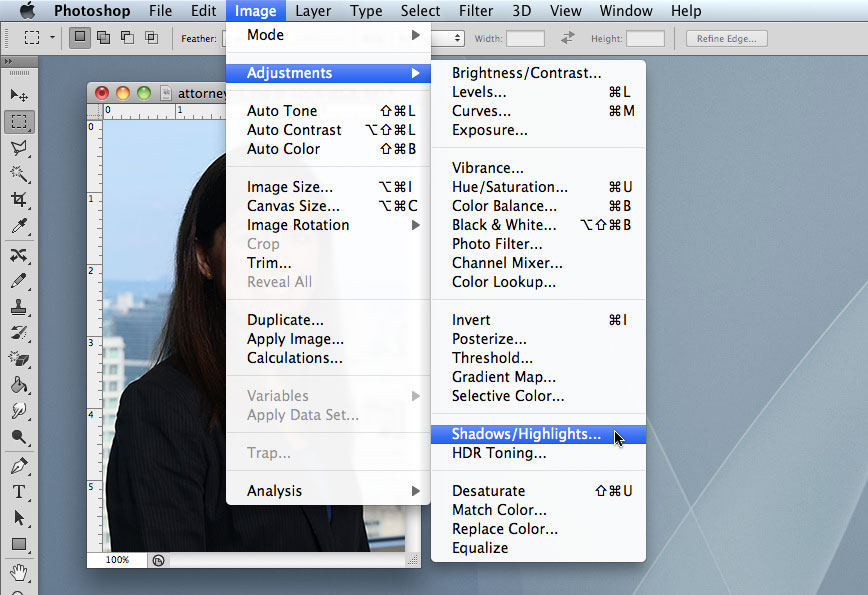
It’s tempting to think this photo is as good as it’s going to be and already shows all the detail contained in the image. But once we try the Shadows/Highlights command, you’ll wonder how you lived without it! The command can be found in the Image > Adjustments submenu:
Click to view larger.
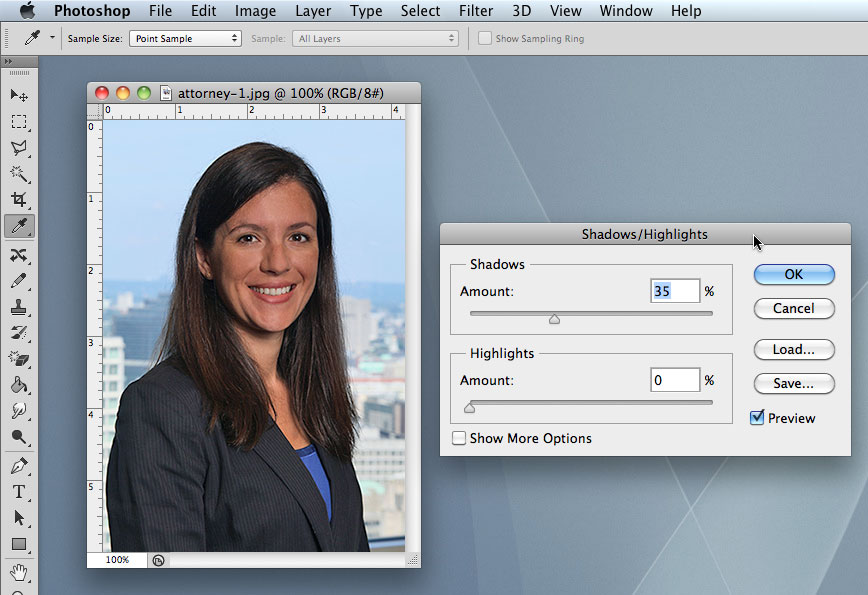
You can instantly see how much detail you’ve been missing. Individual strands of hair are now visible, and – lo and behold – we even discover our subject is wearing a pinstripe suit:
Click to view larger.
The default settings of Shadow: 35% and Highlights: 0% tend to be a bit too strong, so for this image perhaps something like 25/10 is better:

Click to view larger.
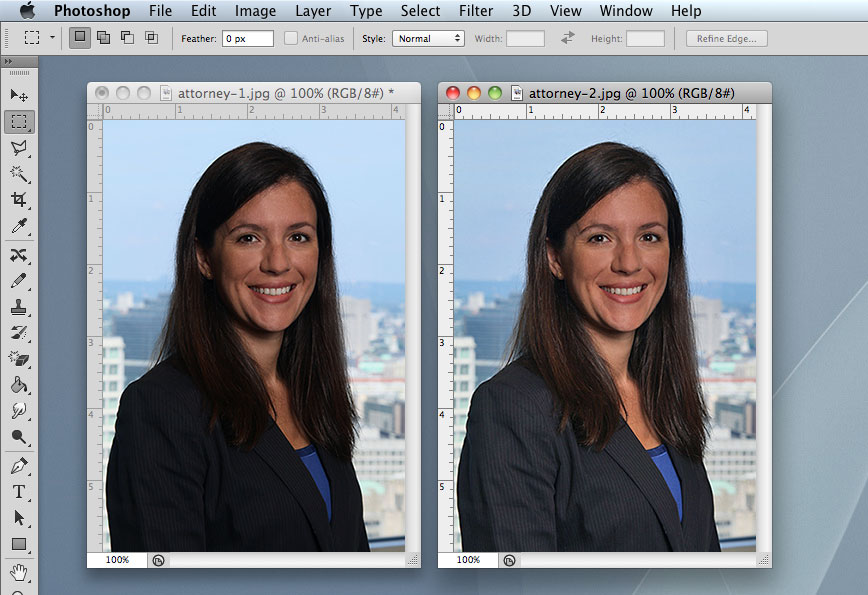
And here are the “before” and “after” for comparison:
Click to view larger.
And that’s it – one simple command can make a world of difference regarding detail and quality. Give it a try!
About The Author