Content management in Canva can get overwhelming fast, with designs, folders, and projects piling up everywhere. But your Canva workspace doesn’t have to feel like a digital junk drawer. With a few simple tips, you can transform it from cluttered chaos into a streamlined system. Here’s how to organize your Canva like a pro and save time on every project.
Note: You can fully customize your Canva organization using these steps, creating a system that fits your workflow and personal preferences. Names, labels, and structure are completely up to you!
Name Those Files ✅
Use Descriptive Names
It may sound self-explanatory, but giving your designs descriptive names by project type, or date (ex: SocialPost-Jan-04-25) makes them easy to find later and makes for a cleaner file name when exporting!
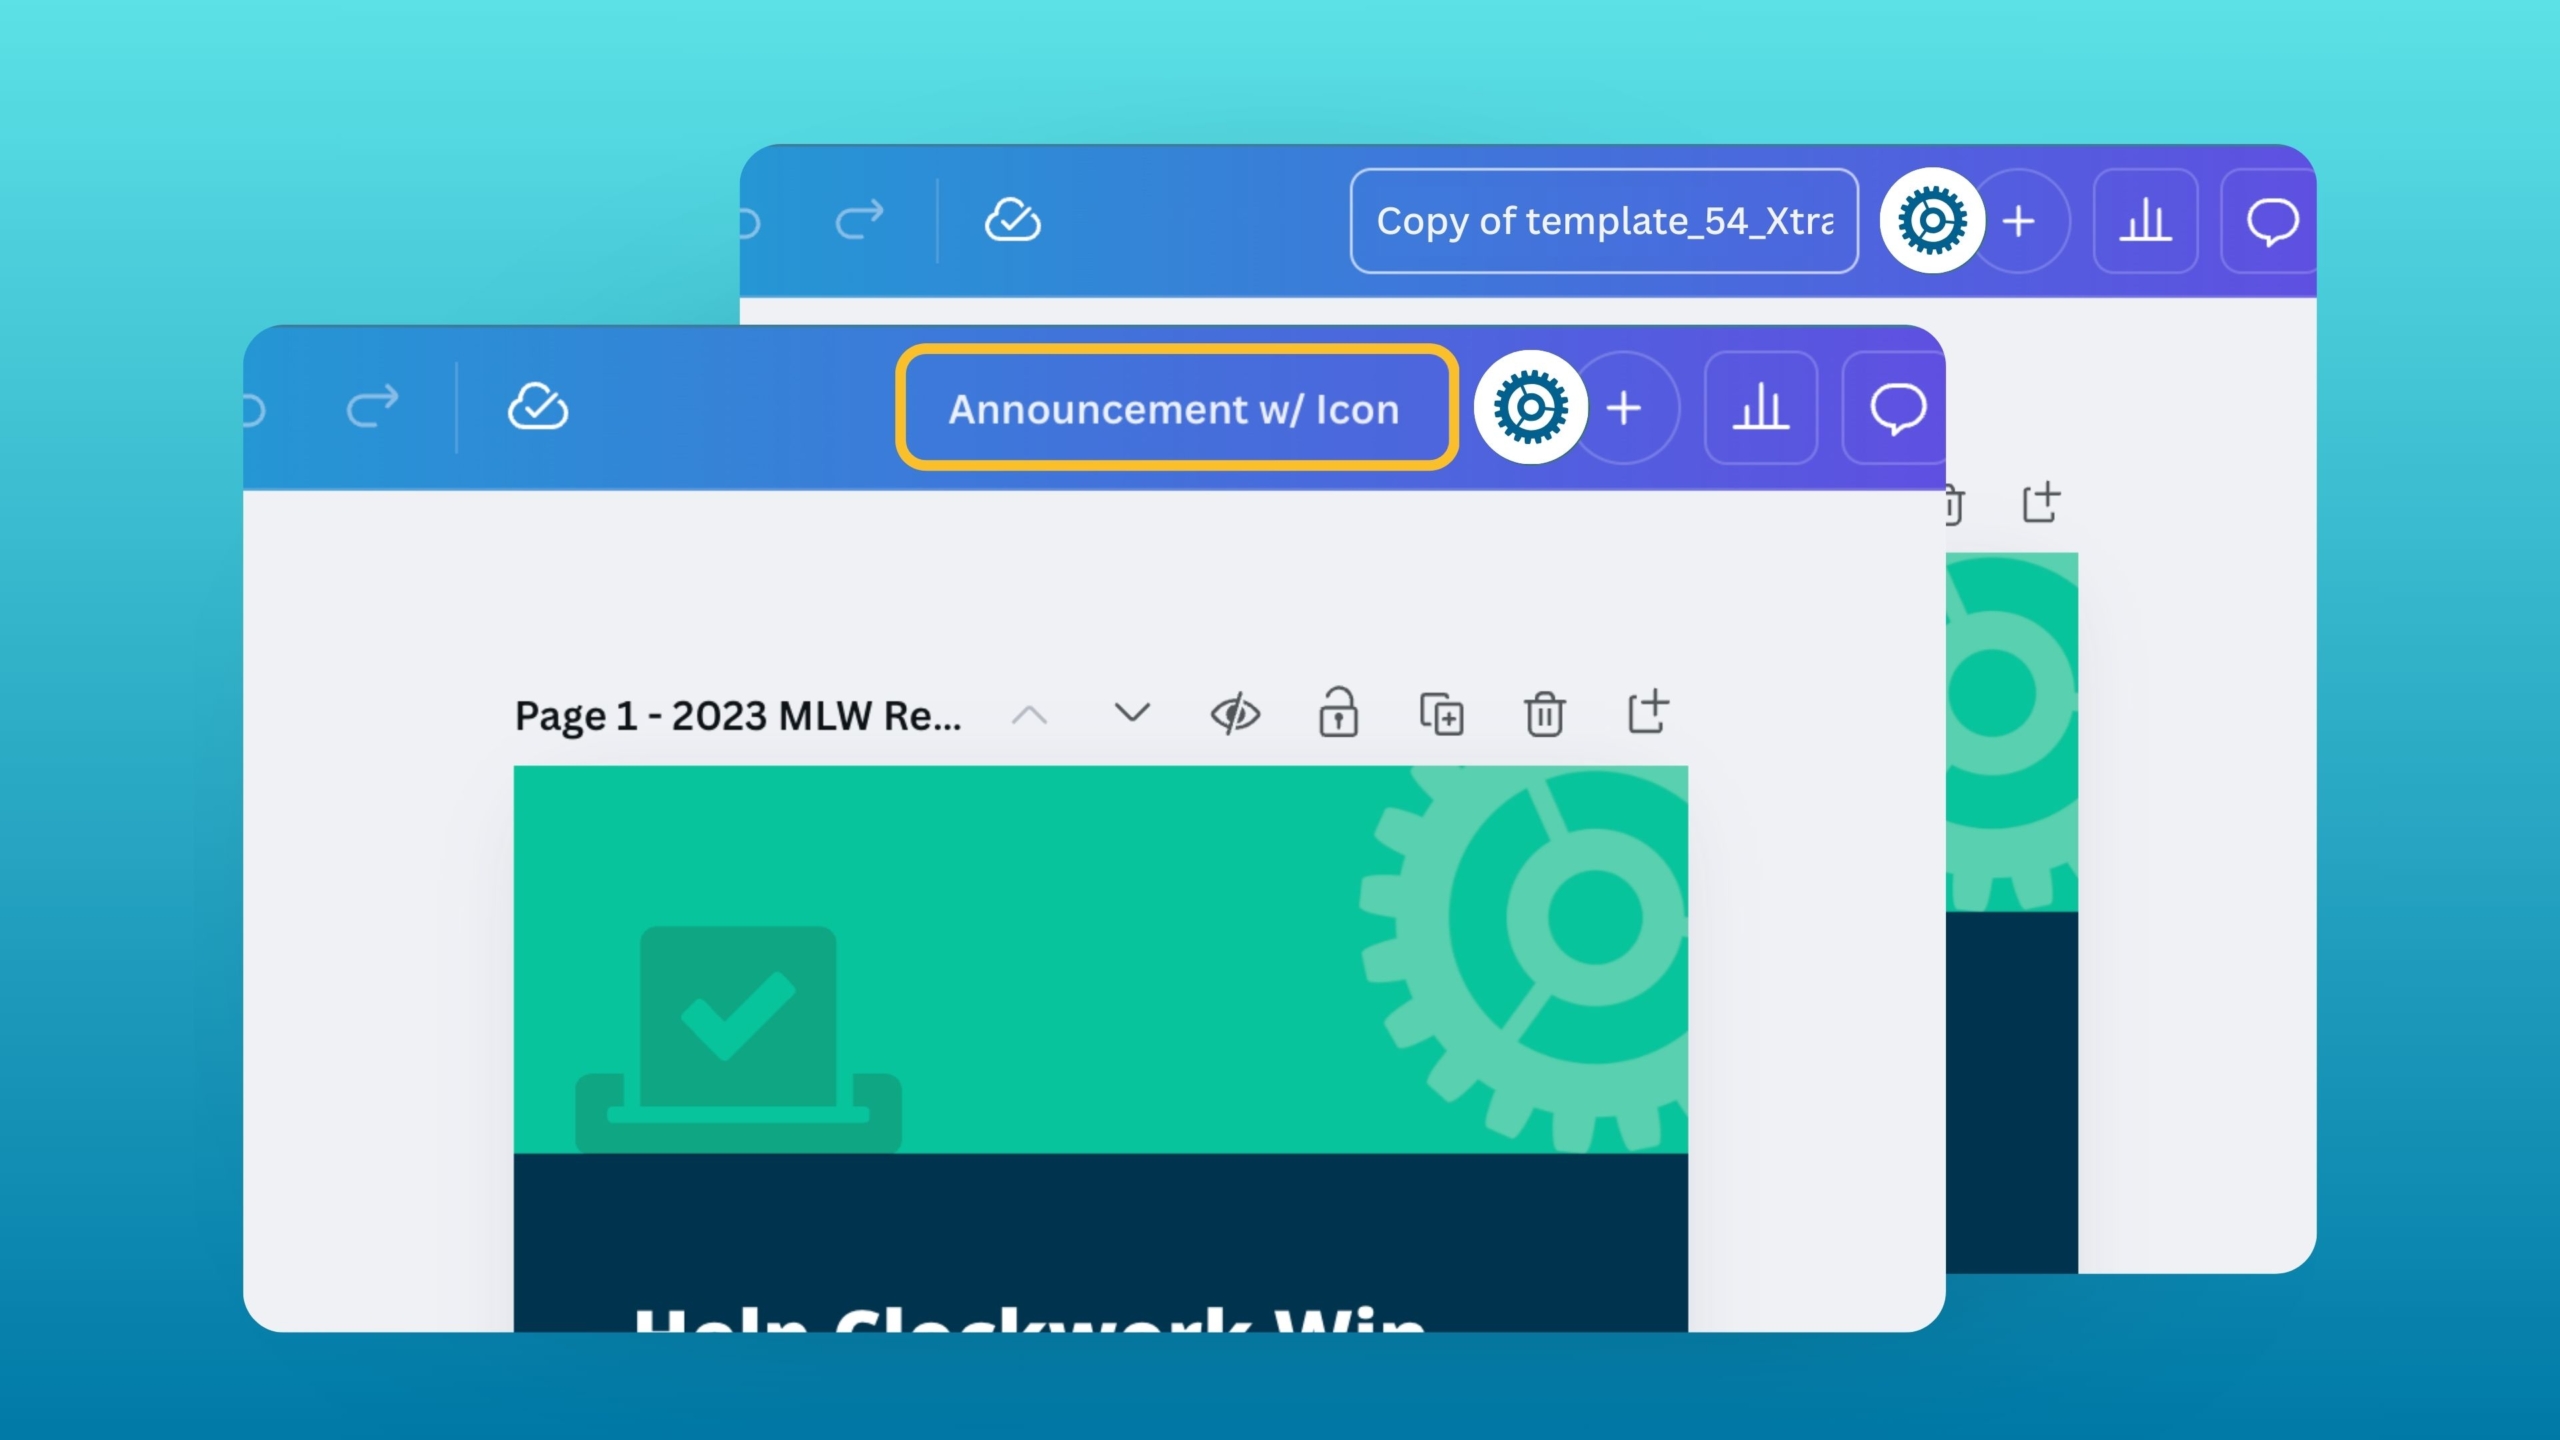
Tip: When using templates or creating duplicates of existing files, Canva will add a Copy of… to the beginning of a file name. Be sure to rename files first, to avoid confusion later on.
Use Folders 📁
If you haven’t already done so, implementing folders can help condense your files into fewer, easier-to-scan, and faster-to-navigate categories.
Project Folders
In your left-hand sidebar, head to the Projects tab. Then select + Add New. Give your folder a name, and if you’re on a business account, you can also choose to share it with your team. Folders are perfect for keeping everything organized, such as Social Media Posts, Client Projects, Presentations, etc. If you’re unsure where to start, try setting up folders using main categories to establish a clear system from the beginning.
Sub Folders
To create a subfolder, make sure you are inside a project folder, then select + Add New. Follow the same steps as before, except now, create a nested subfolder within a main folder. Subfolders can help organize any additional collateral needed for a project (such as images, logos, and graphics) or simply serve as a place to store extra designs.
Star Your Favorites ⭐

Starring
Canva lets you star designs, folders, and templates. Starred items appear in your sidebar under the Home and Projects tabs, making it easy to quickly access the files you use most.
Custom Starred Sections
You can take the starring feature a step further by creating custom sections within your starred area in the sidebar. Just click the + icon beside the Your Starred heading, then give the section a name, and drag-and-drop your starred items into it. This is a great way to group related designs or folders for even faster access.
Bonus: You can even add emojis to your custom sections! Simply select the ☺ Smiley Face icon when naming your custom section, and you can choose from Canva’s entire emoji library. This makes for the ultimate labeling system for multiple sections.
Organize Files in Bulk ⚙️
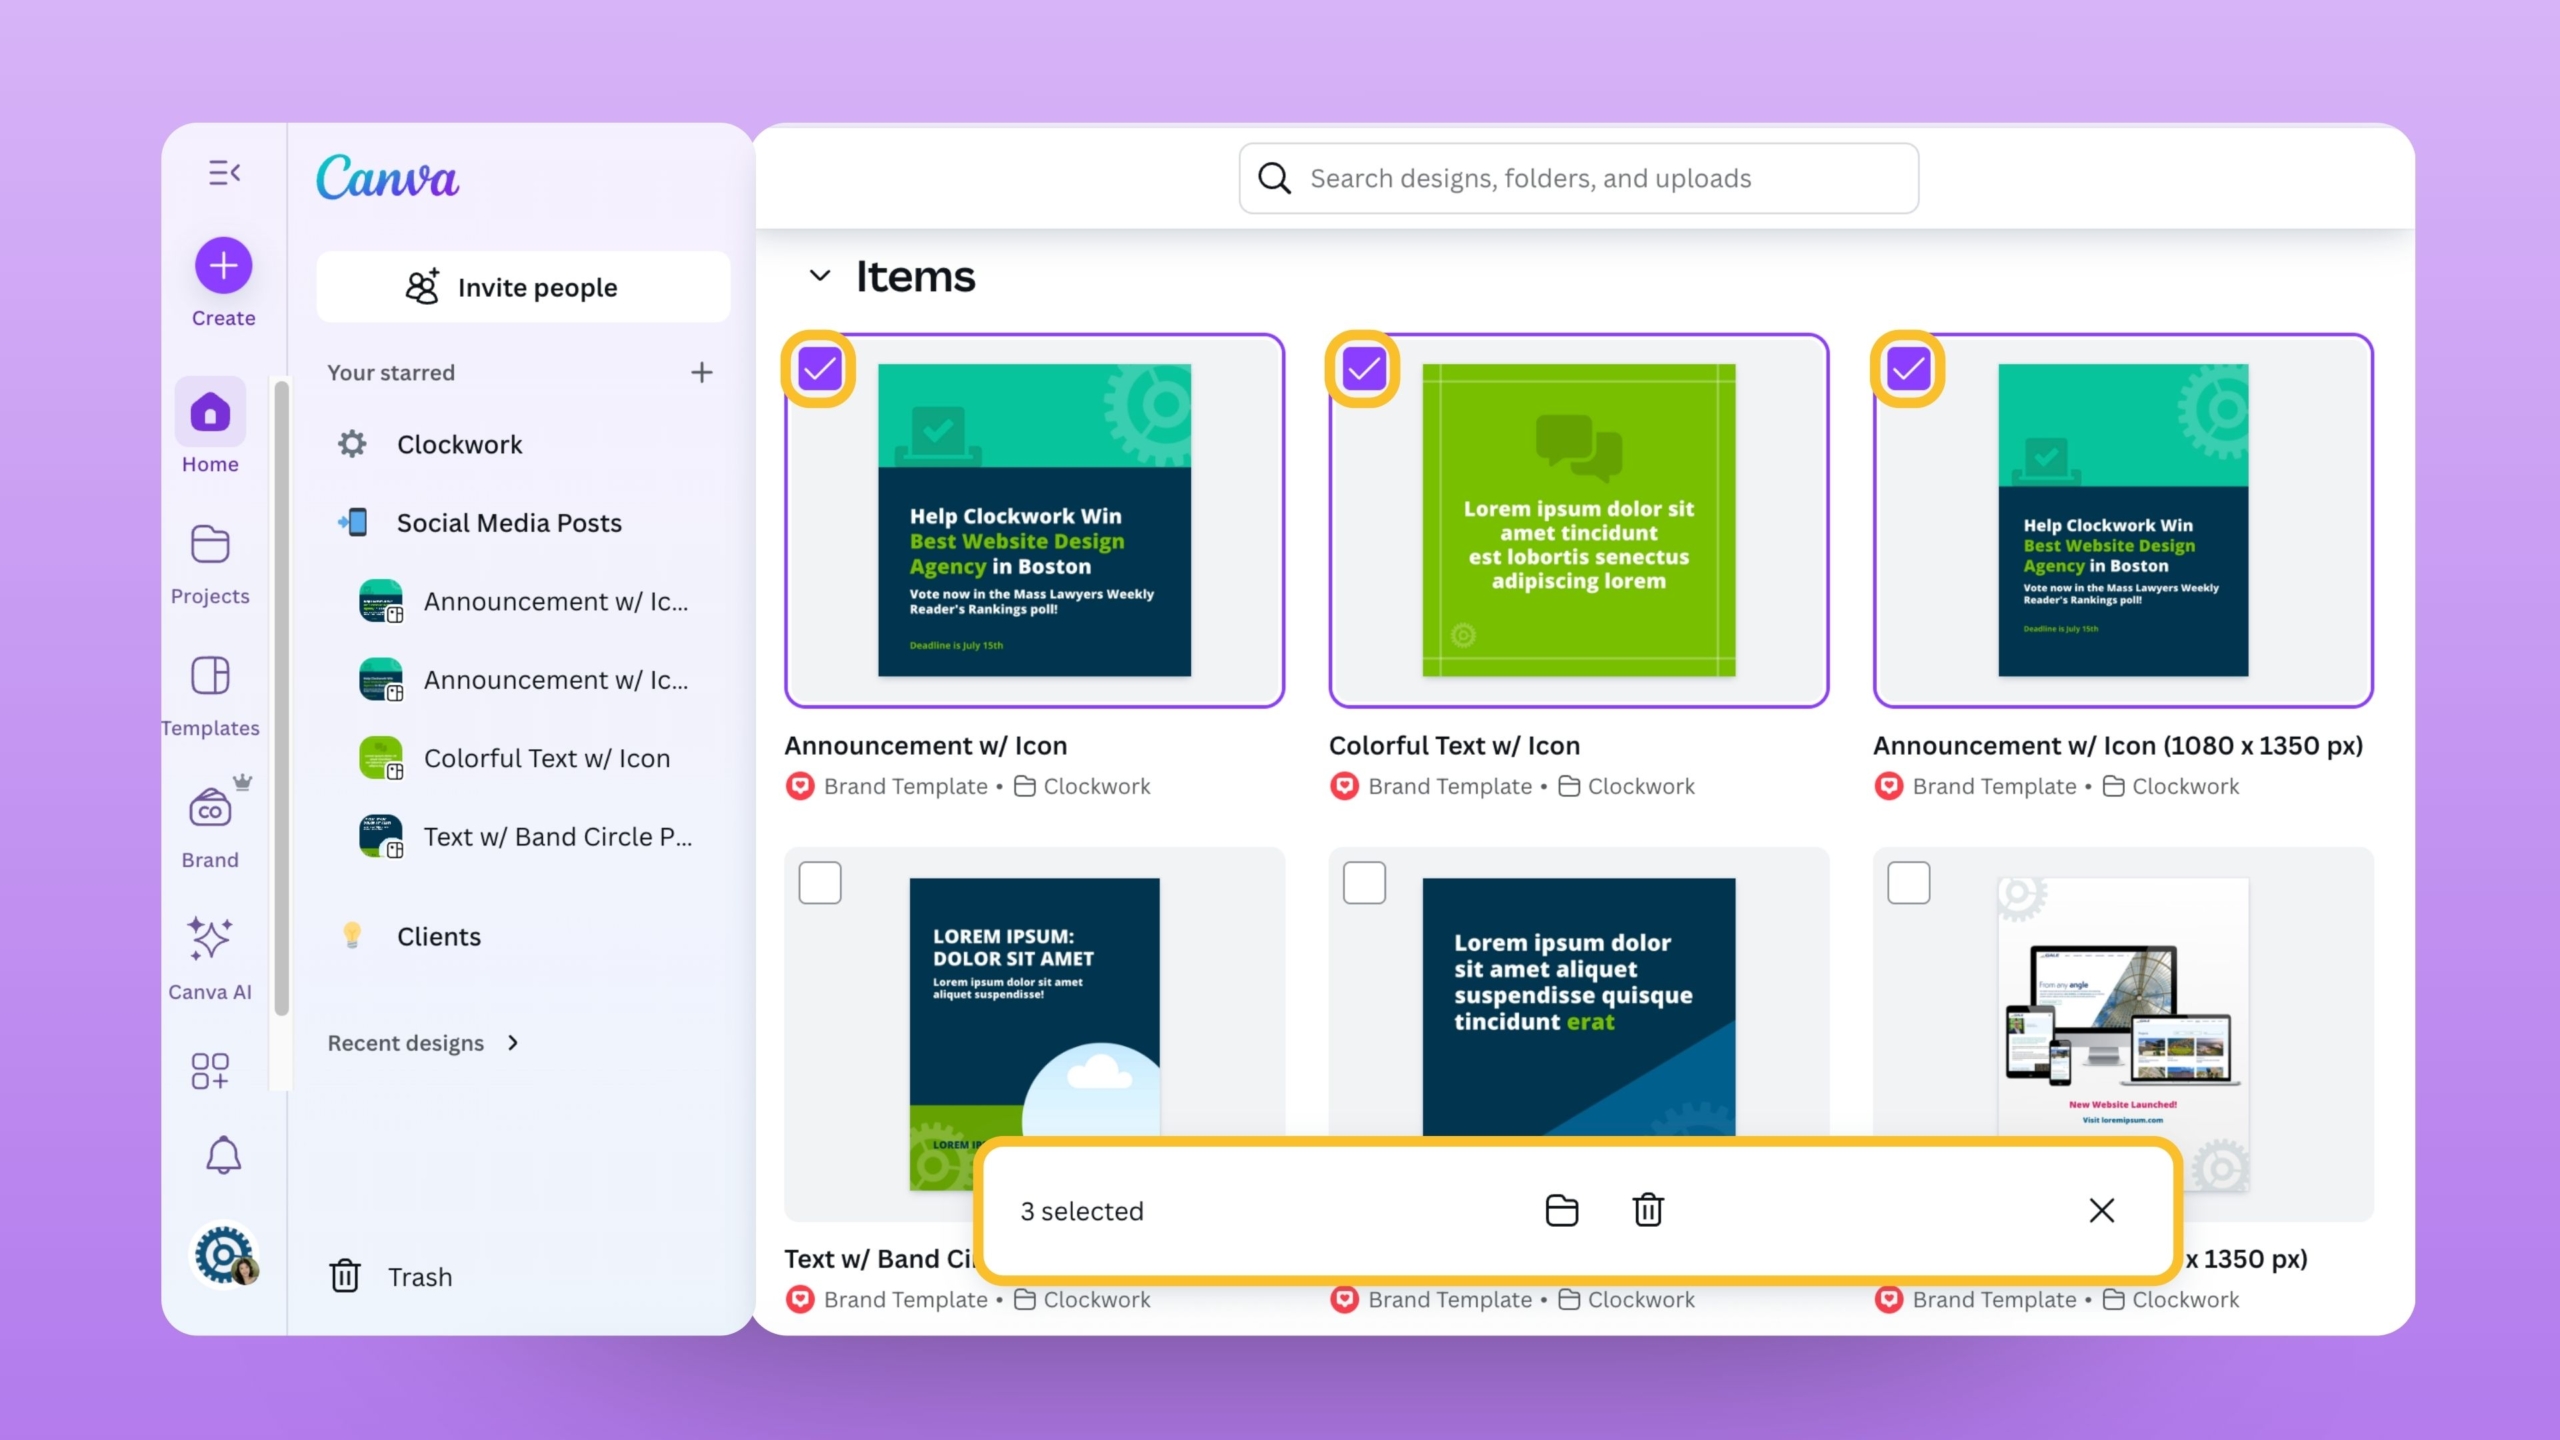
Canva also lets you move, star, and rename multiple files at once. To access these options, hover over a design, folder, or template to reveal the controls. The checkbox allows you to select multiple items, the star adds a file to your sidebar favorites, and the three dots open more actions like sharing, renaming, or downloading. When you select more than one file, a taskbar appears with options to Move or Move to Trash. Choosing Move will open a menu with your existing project folders so you can organize files in bulk with just one click.
Related Posts
About The Author