
One of the quickest and easiest ways to improve an image in Photoshop is the use of setting a white point. It can drastically change a picture from being a dull and dingy shot with too much yellow and grey tint to one with bright, exciting colors. And it’s so easy – a single click is usually all you need to do!
Let’s start with the fine feathered friend:
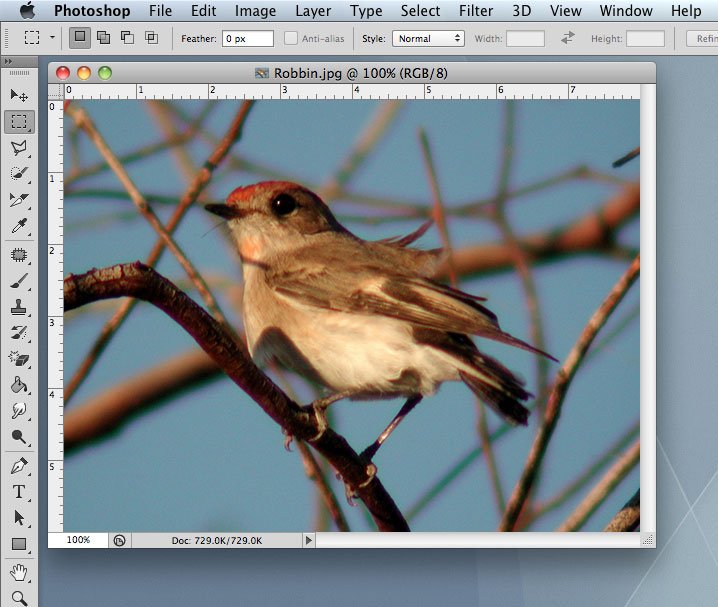
It’s an okay picture, but there’s clearly too much yellow and grey muddying it up. To fix this, go to the Image menu, then Adjustments, then “Levels…”:

See those three eyedropper icons? You’ll want to click on the third one – the one used for setting white point:
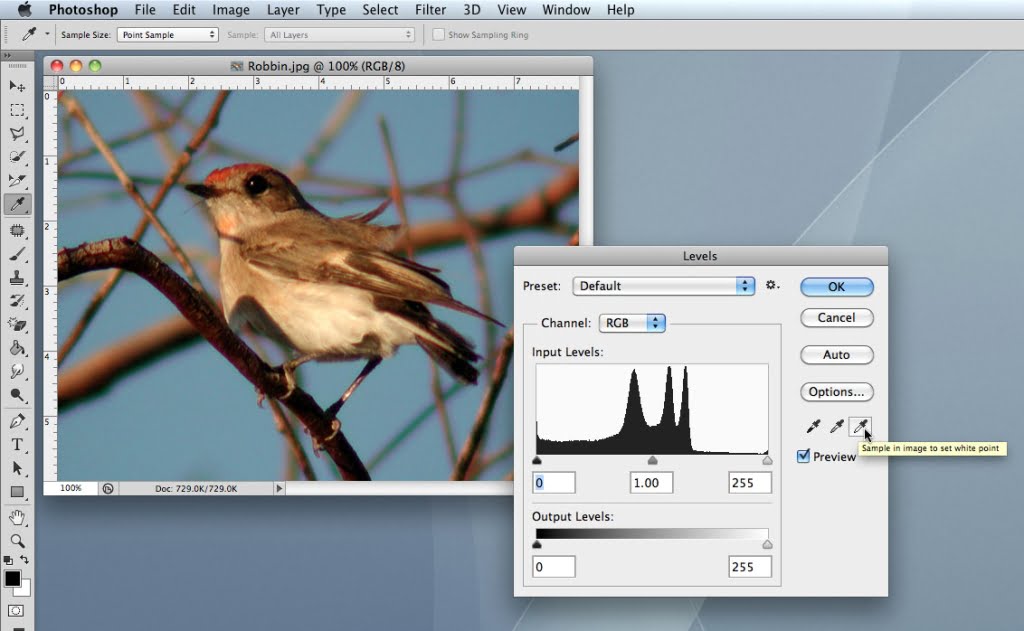
Next, find one of the brightest areas in your existing photo and click on it with the eyedropper icon, telling Photoshop to set the levels so that your selected pixels are the new white point:
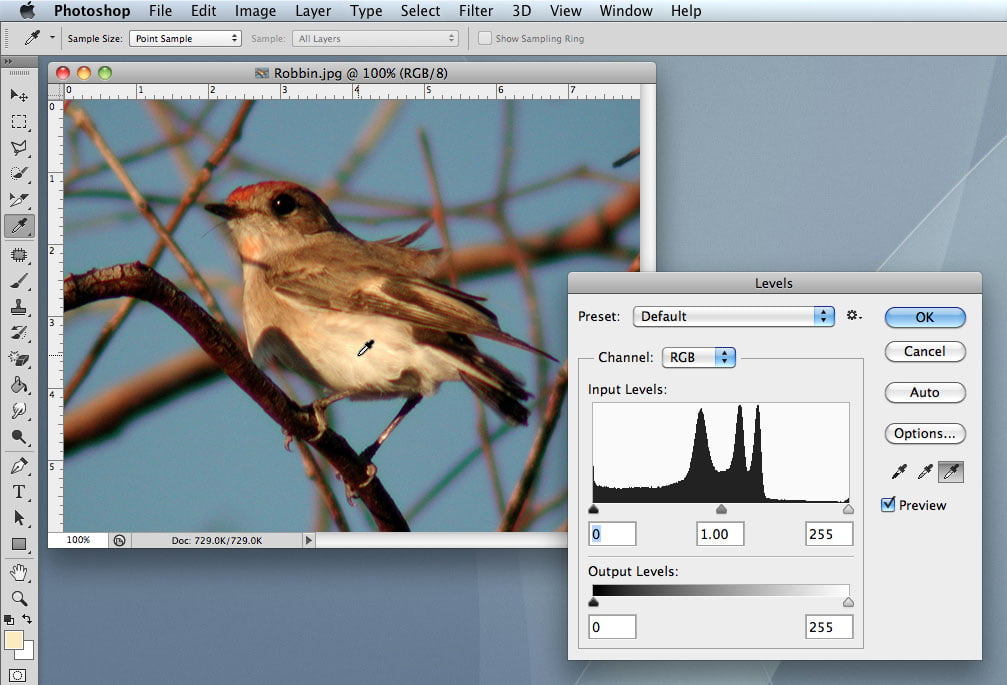
As soon as you click, the photo levels will adjust so that the off-white you chose becomes the white point, while the rest of the photo reacts accordingly:
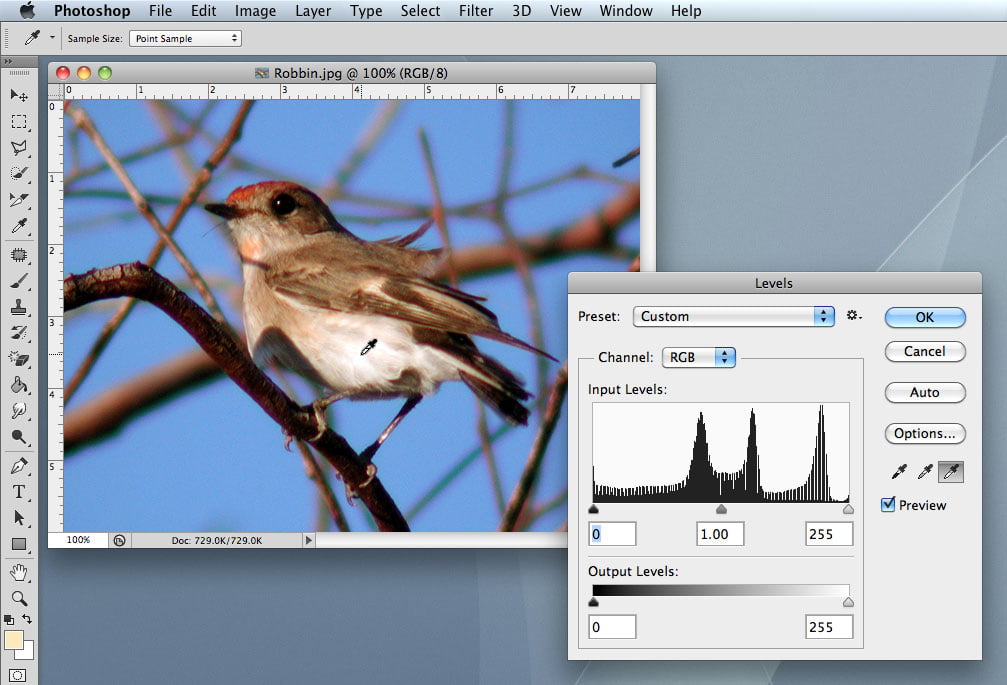
To see how incredible this one click can be, here are the “before” and “after” shots side-by-side. The yellow and grey tones that were taking the life out of the shot are now under control:

With this single command, it’s blue skies all the way!
About The Author