
One of the first things we do when beginning a website project is create a site map. A site map is a “blue print” of sorts, outlining all the pages on your website. A well defined site map can really help get a website project off to a good start, and keep it on track through completion. Read on to learn how to build a website site map:
Create Your Current Map
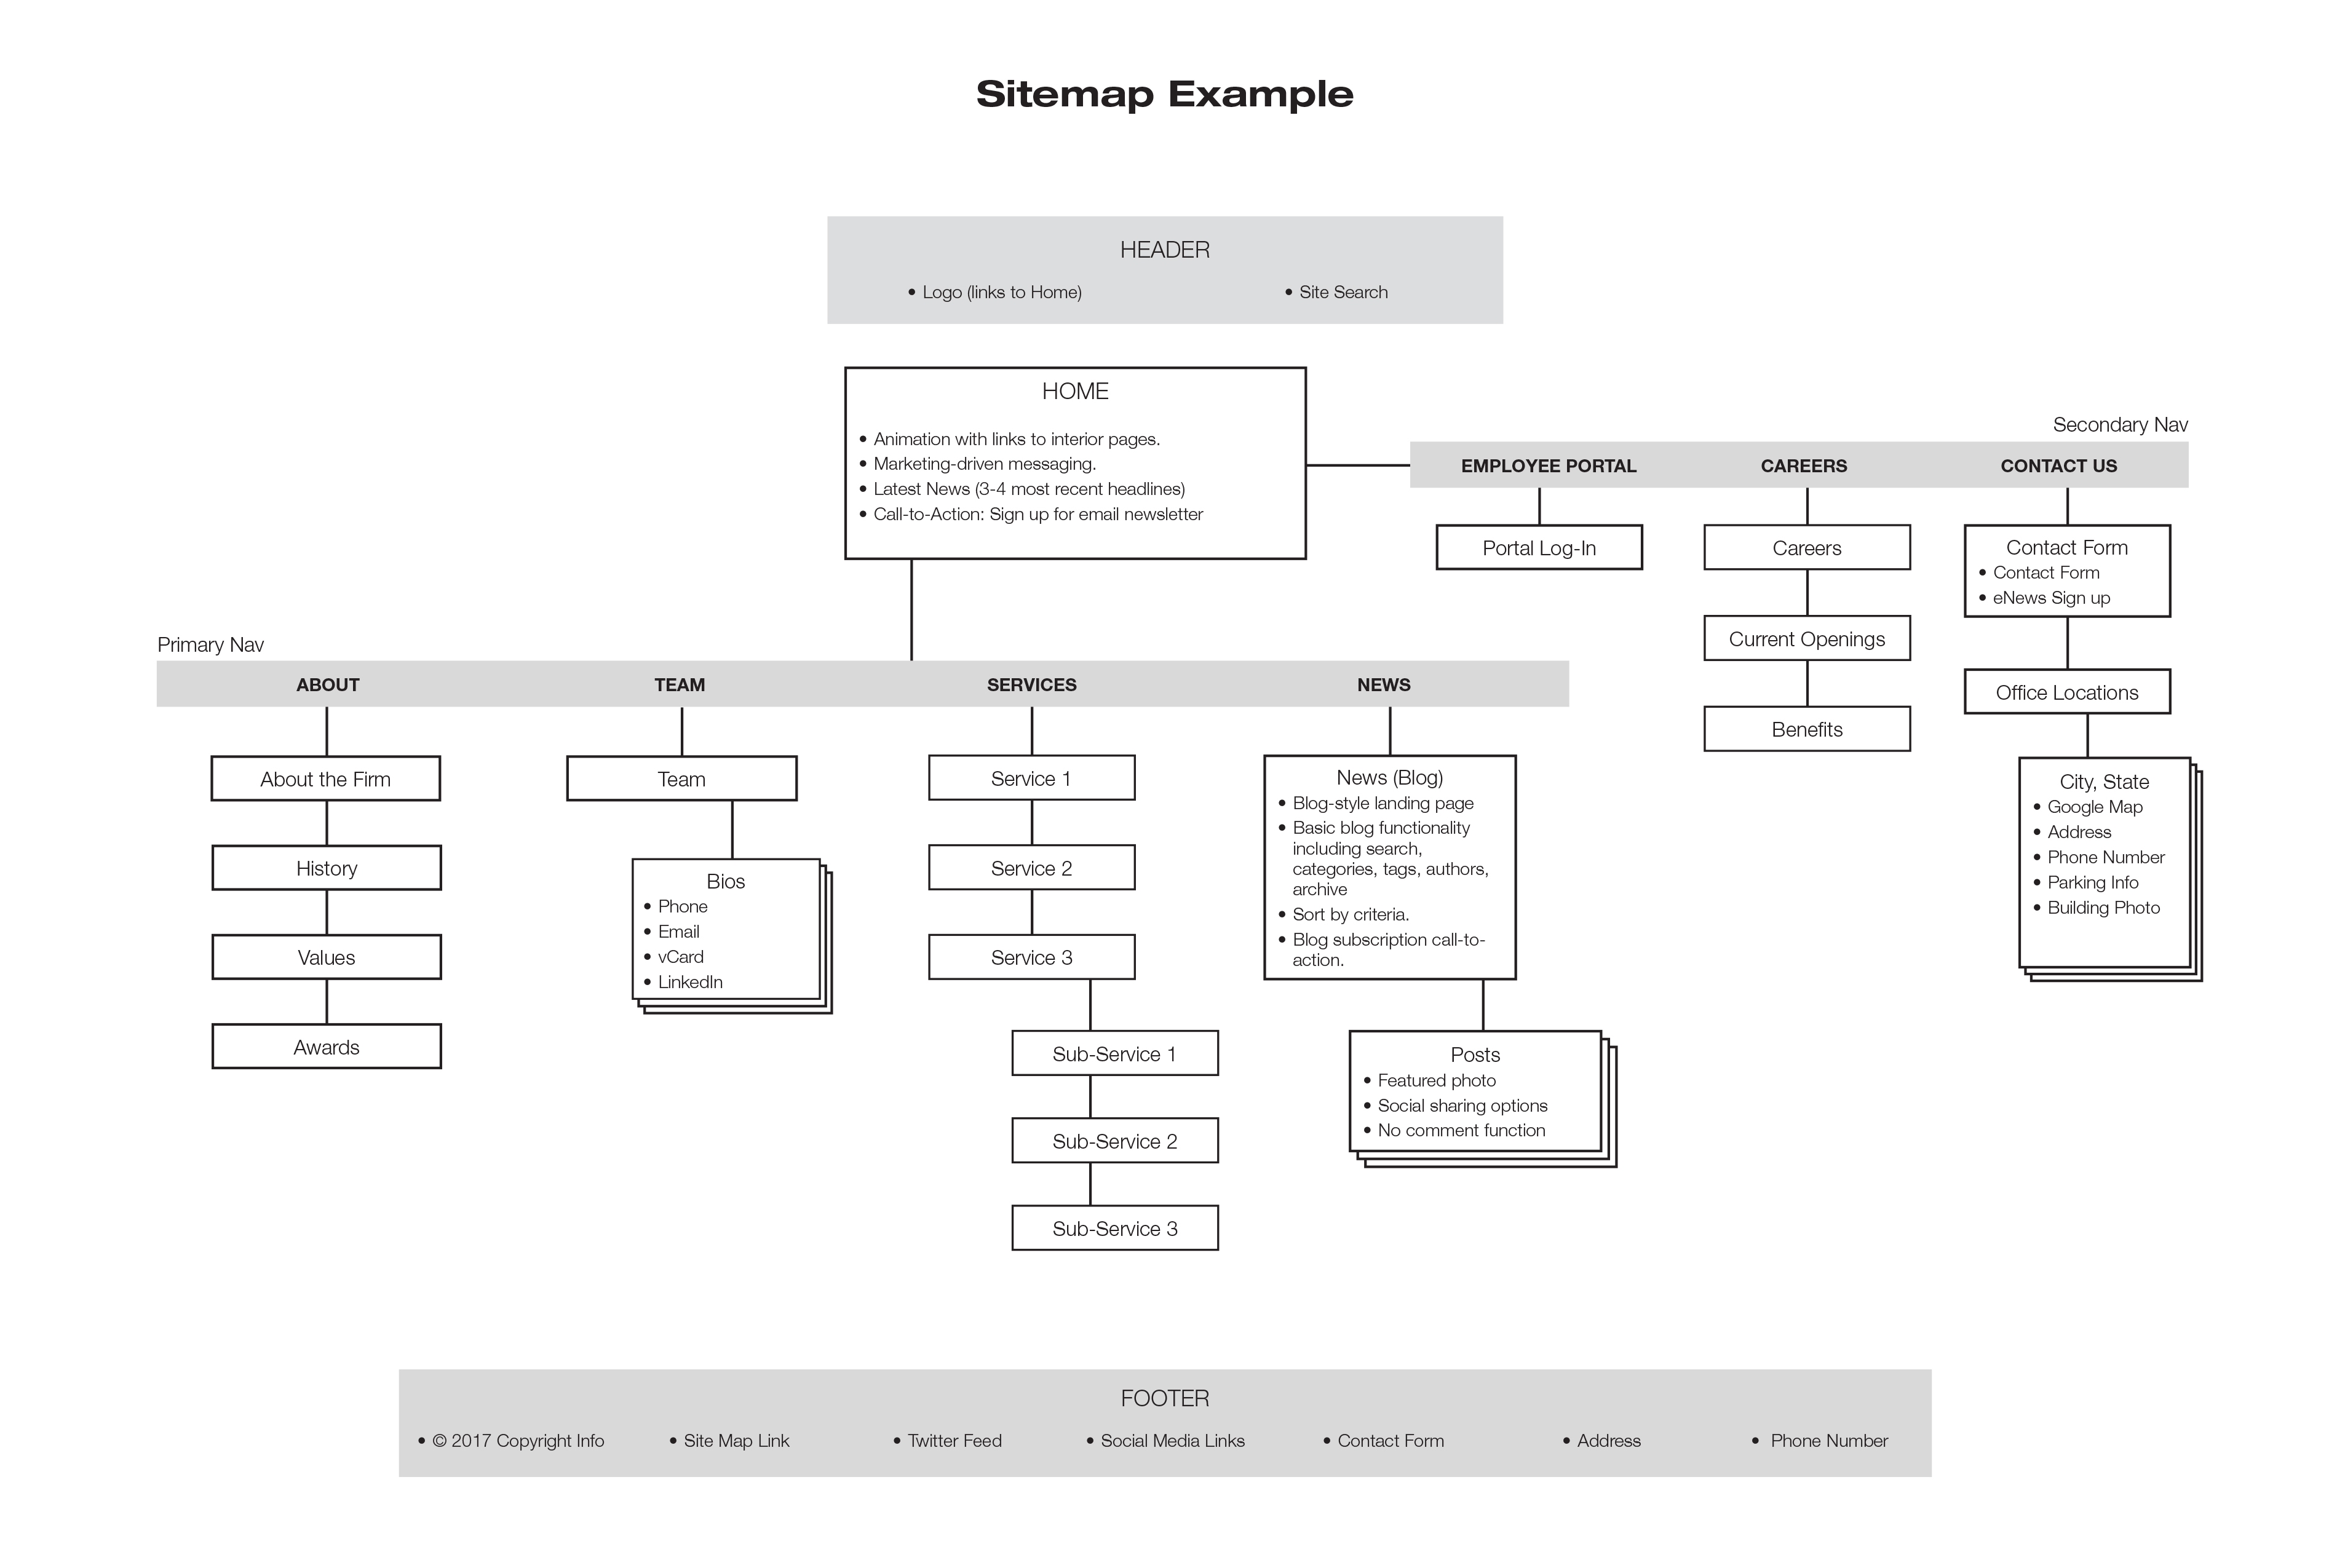
It’s very important to document your current site map (of your existing, live website) prior to starting the redesign process. Your current site map will serve as your baseline, and let you and others working on the project easily decide where content needs to be added, removed, consolidated and reorganized. Site maps can be documented in many different ways. Some people use a simple list structure, but I much prefer a more visual method, using actual boxes to define each page.
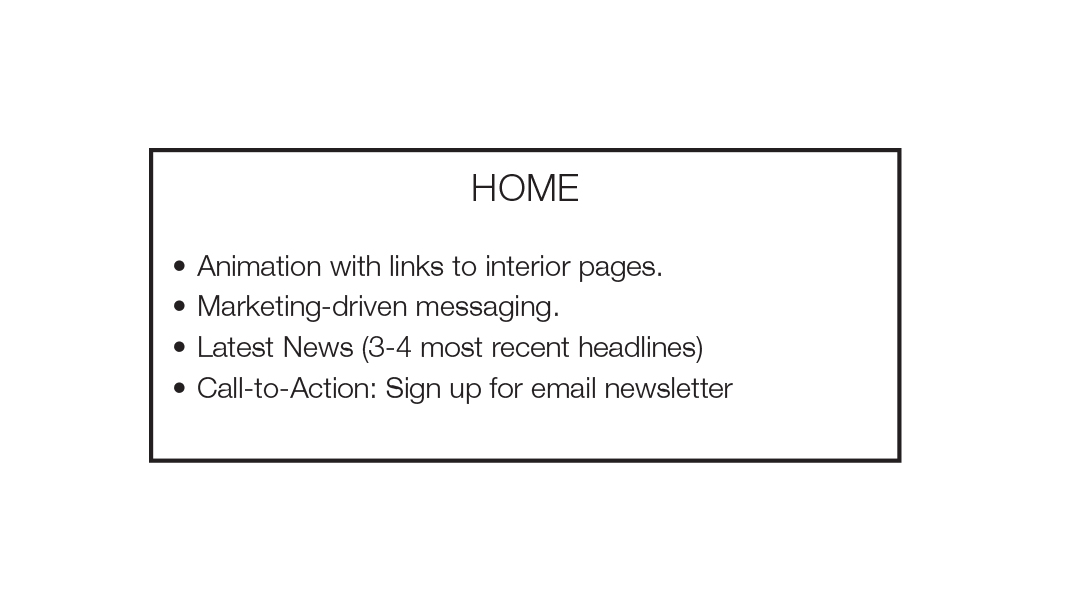
Step 1: Homepage
To begin, look at the homepage of your current website, and jot down the kinds of content that you see there. Now, make a box titled “HOME” and a bullet for each piece of content you identified. It may look something like this:
Step 2: Navigation
Now look at your main navigation. “Navigation” elements are the tabs that define the primary sections of your website. Navigation items usually remain in a constant, or relatively constant placement throughout your site, so people can easily find, click and jump from section to section. I like to show navigational items in a gray band, to differentiate them from pages of content. It may look something like this:

Some sites have a secondary navigation in addition to the main navigation. It’s often placed slightly above the main navigation, and may include content that you want to set off separately, such as:

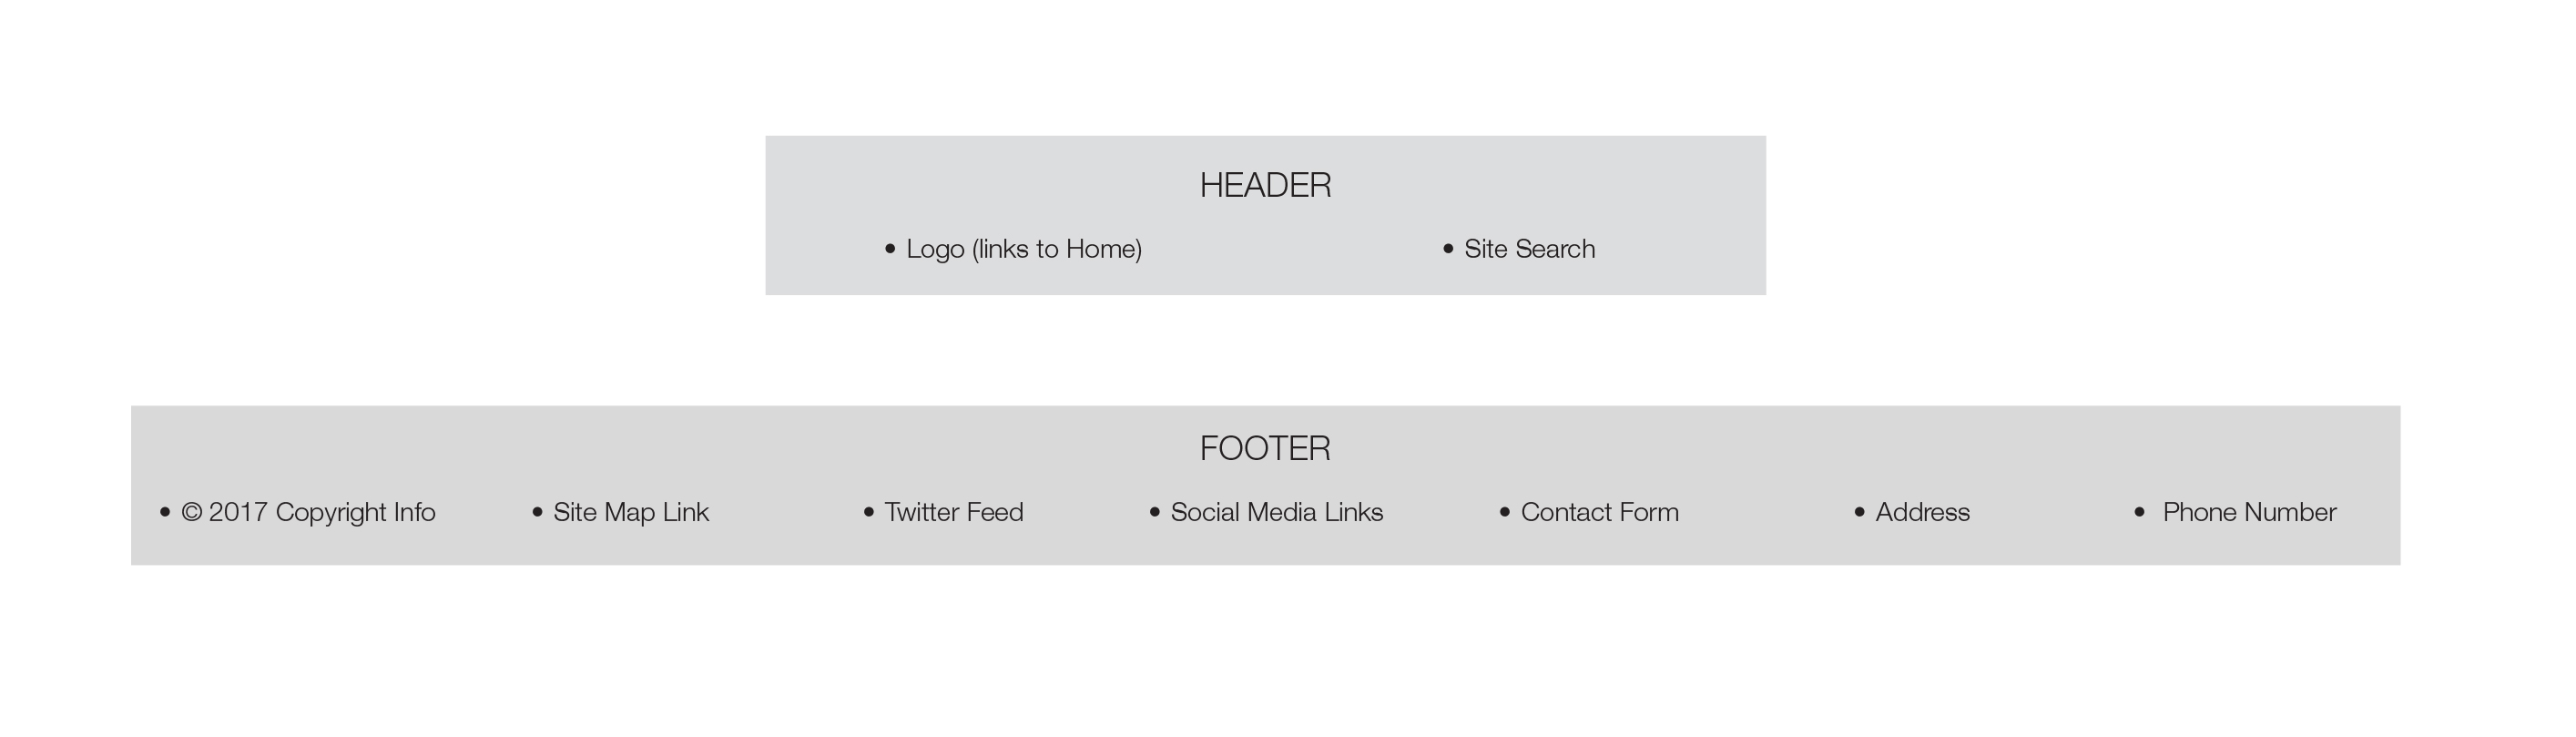
Step 3: Header and Footer
In addition to navigational content that is universal on all pages, most websites have header and footer content, also universal across the entire site. Your firm logo will almost always appear in the header, and act as the “home” button (rather than including the word “Home” in the main navigation, which is now considered dated.) A search button is commonly found in headers as well. Footers may include copyright info and your firm’s address and phone number. More robust, modern footers may have a Twitter feed, contact form, email sign-up, Google map, and more. Links to your firm’s social media pages can be placed in the header or footer, depending on how prominent you want them. Here are a few examples:
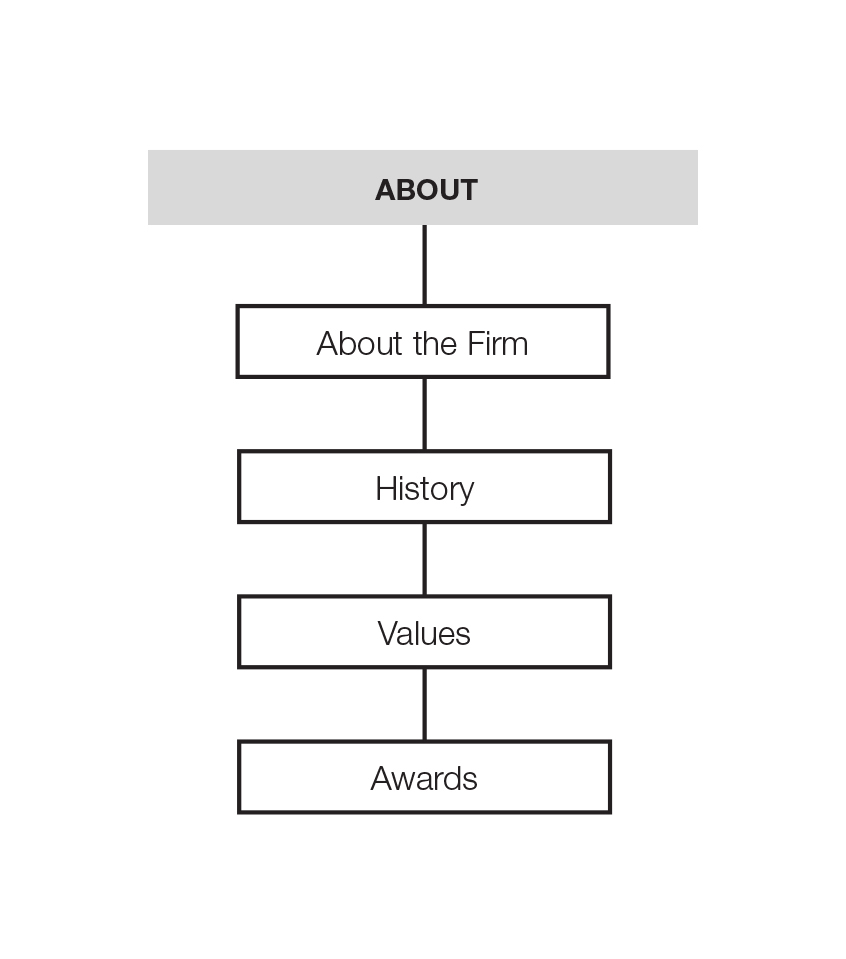
Step 4: Page Content
Now that you have your site’s framework in place, you are ready to start filling in page content. I usually begin with the first navigation tab of the site, in this example, “About.” Create a box for each page that falls under About, such as:
Step 5: Similar Page Content
For sections of your site where you have large numbers of similar page content – such as team bios, projects, news posts, etc.-you simply can’t diagram every page. For those areas, I create “stacked” boxes to indicate multiple pages:
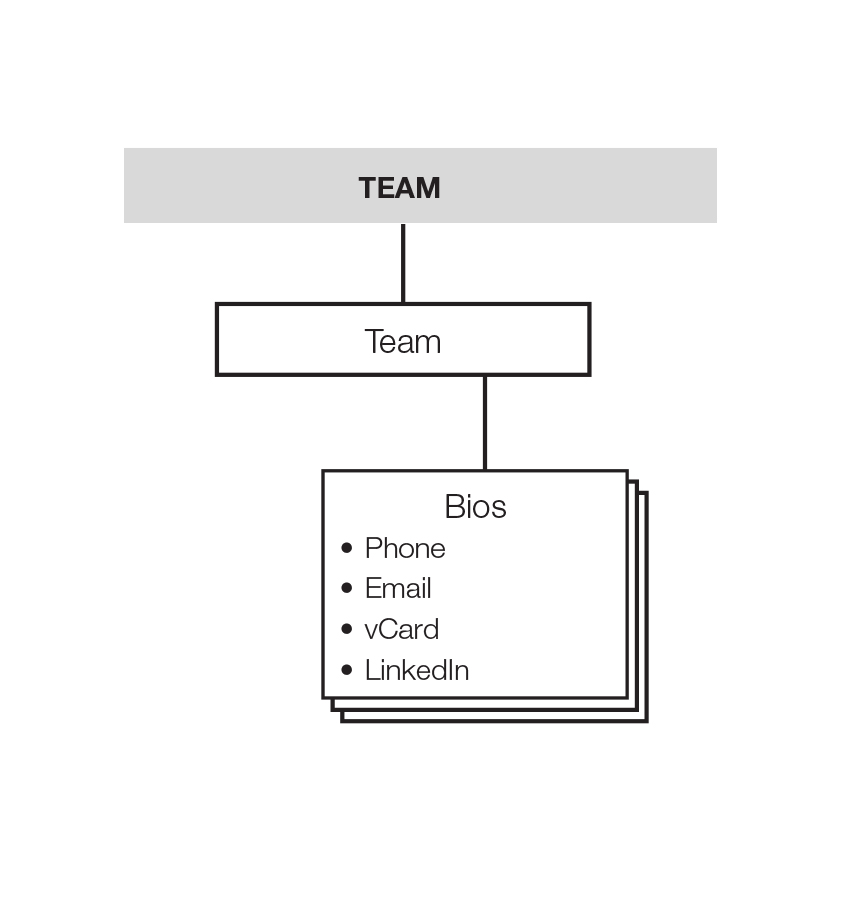
Here again, I used a bullet to identify important content to include on each bio page.
Step 6: Finished Site Map
When you have documented all of the pages on your site, the finished site map can be duplicated and updated to define the content on your new site going forward. We often color-code boxes to indicate which pages have all content completed, which need new text, new photos, final sign-off, etc.
Obviously, each website map will look different based on the specific content and structure of the site, but following this process should work for most professional service firm sites. Here’s an example of a simple site map:
Related Articles:
How to Avoid Website Dead Ends
Vanessa’s article first appeared in SMPS Boston’s Outlook, November.
About The Author