
A great tool in Adobe Photoshop is Sky Replacement. And yes, it does exactly what the name implies – it replaces the sky in an image. And it’s really easy to use.
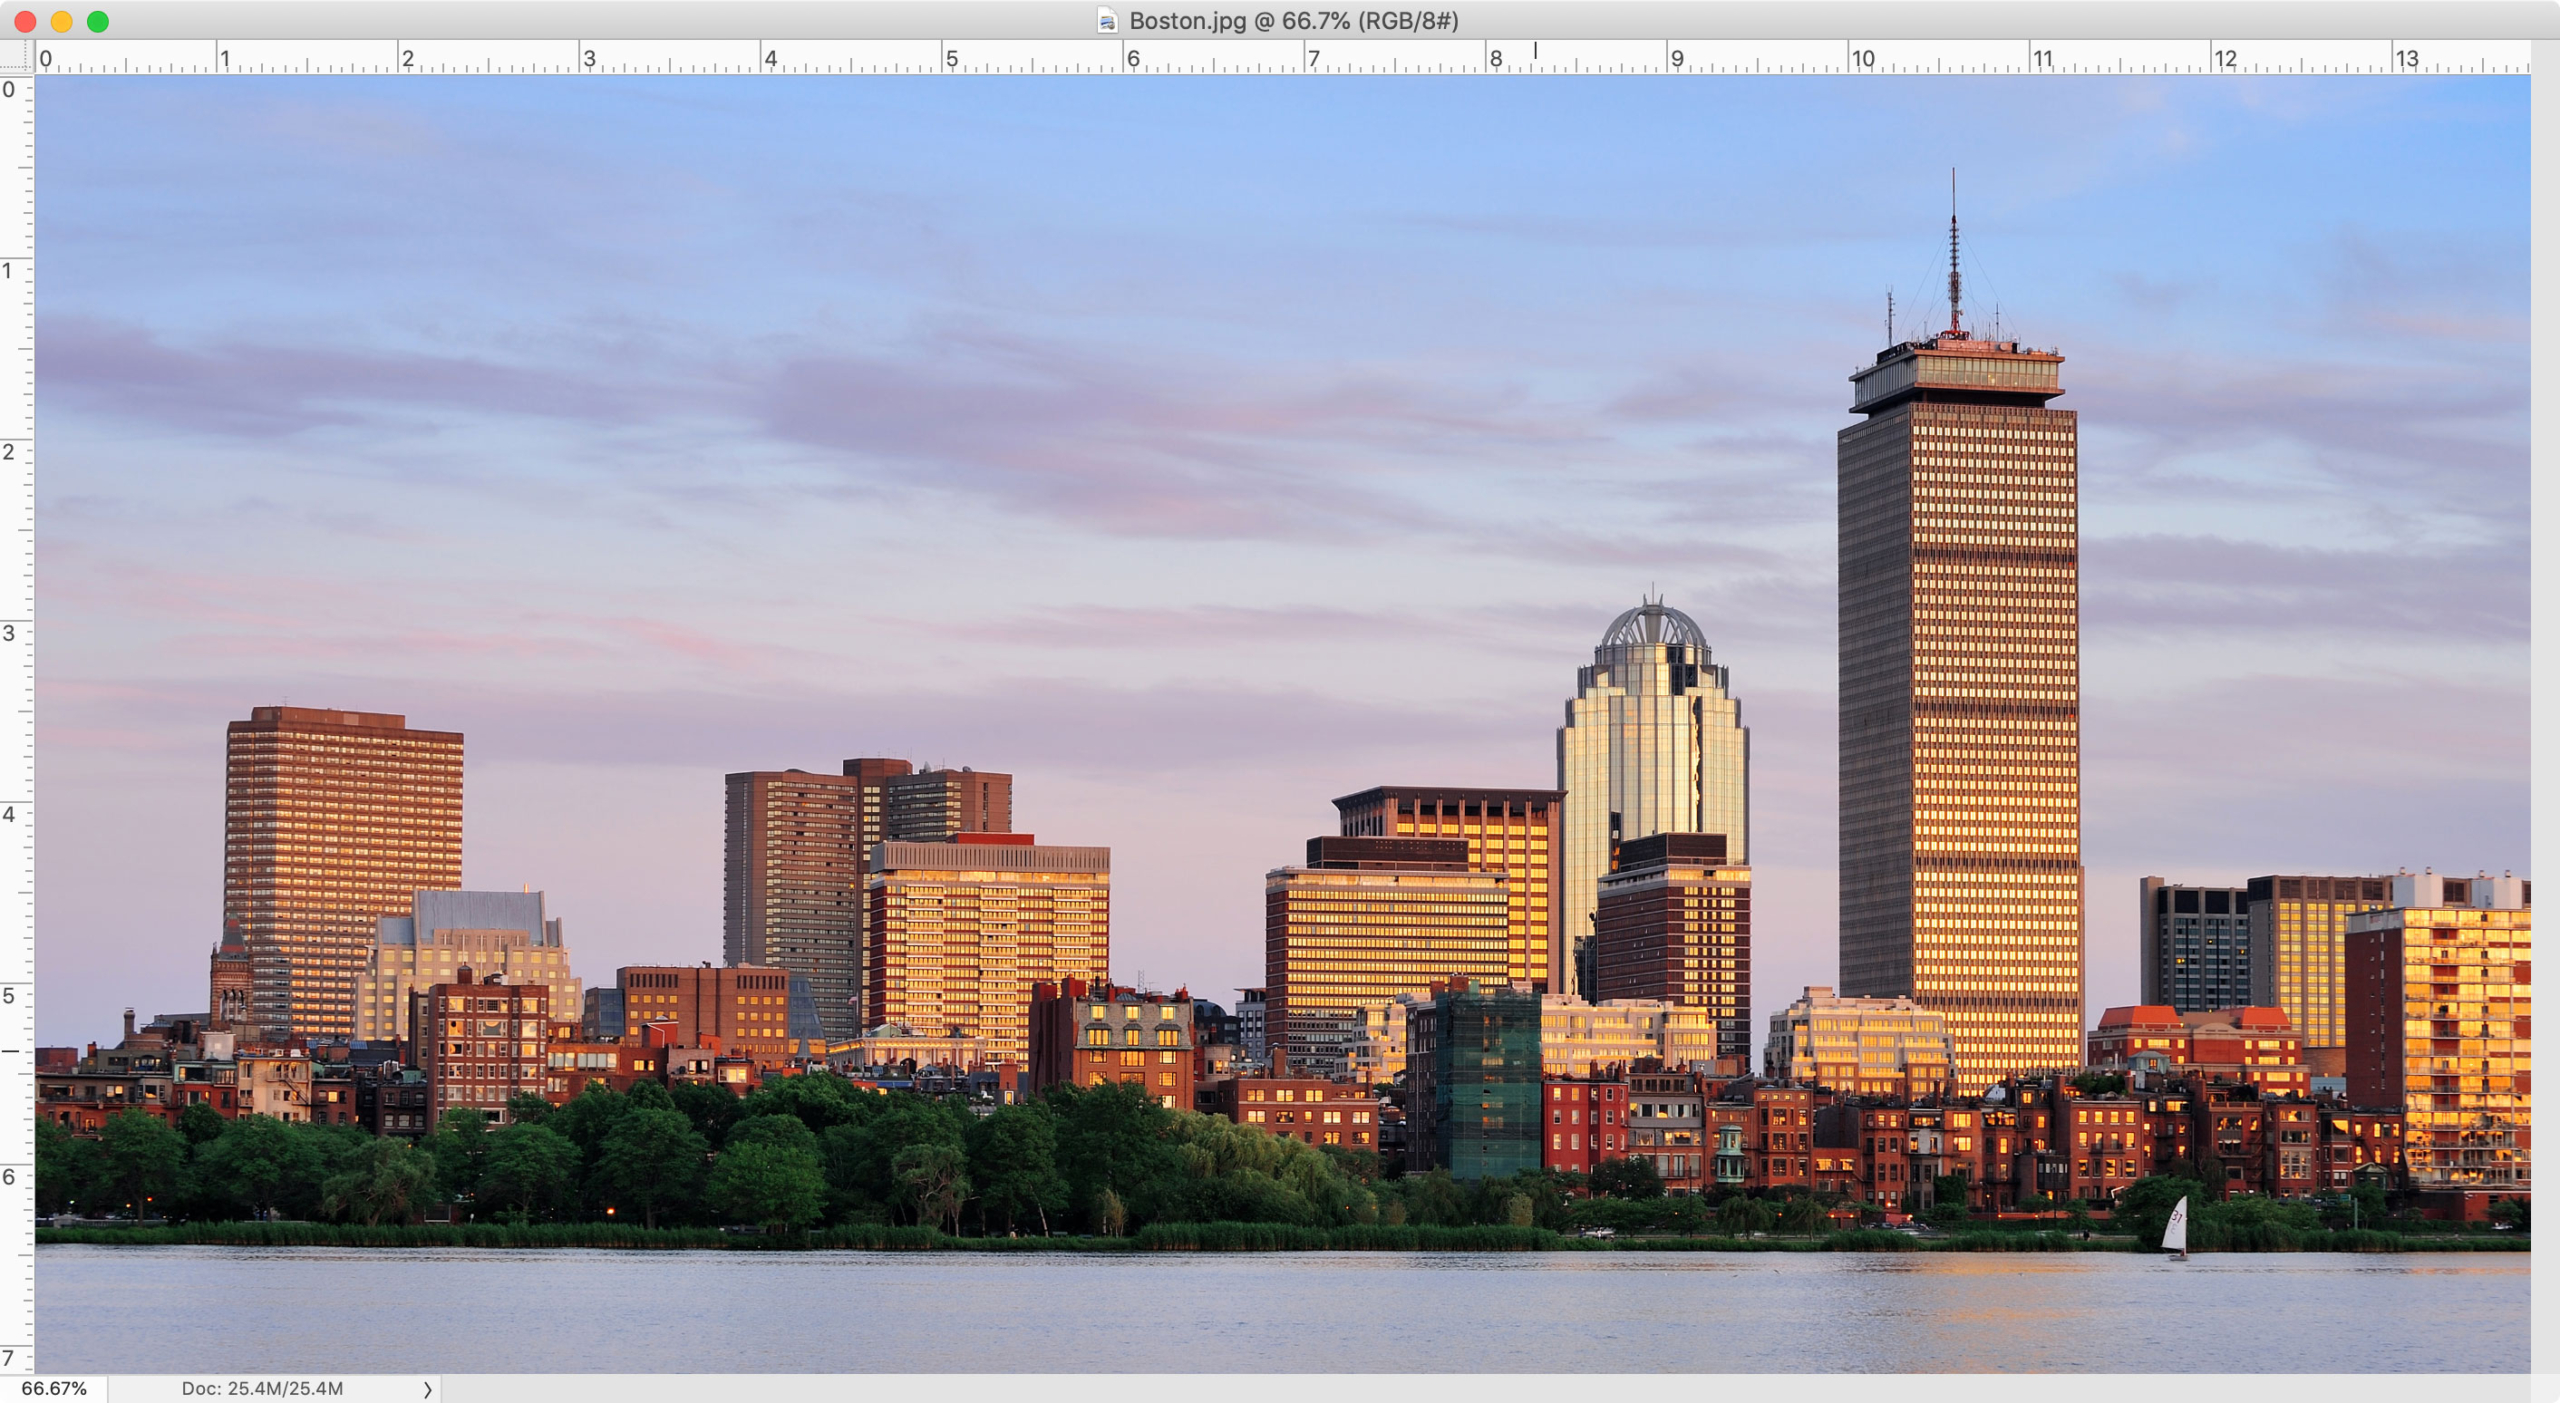
Let’s start with this shot of Boston:
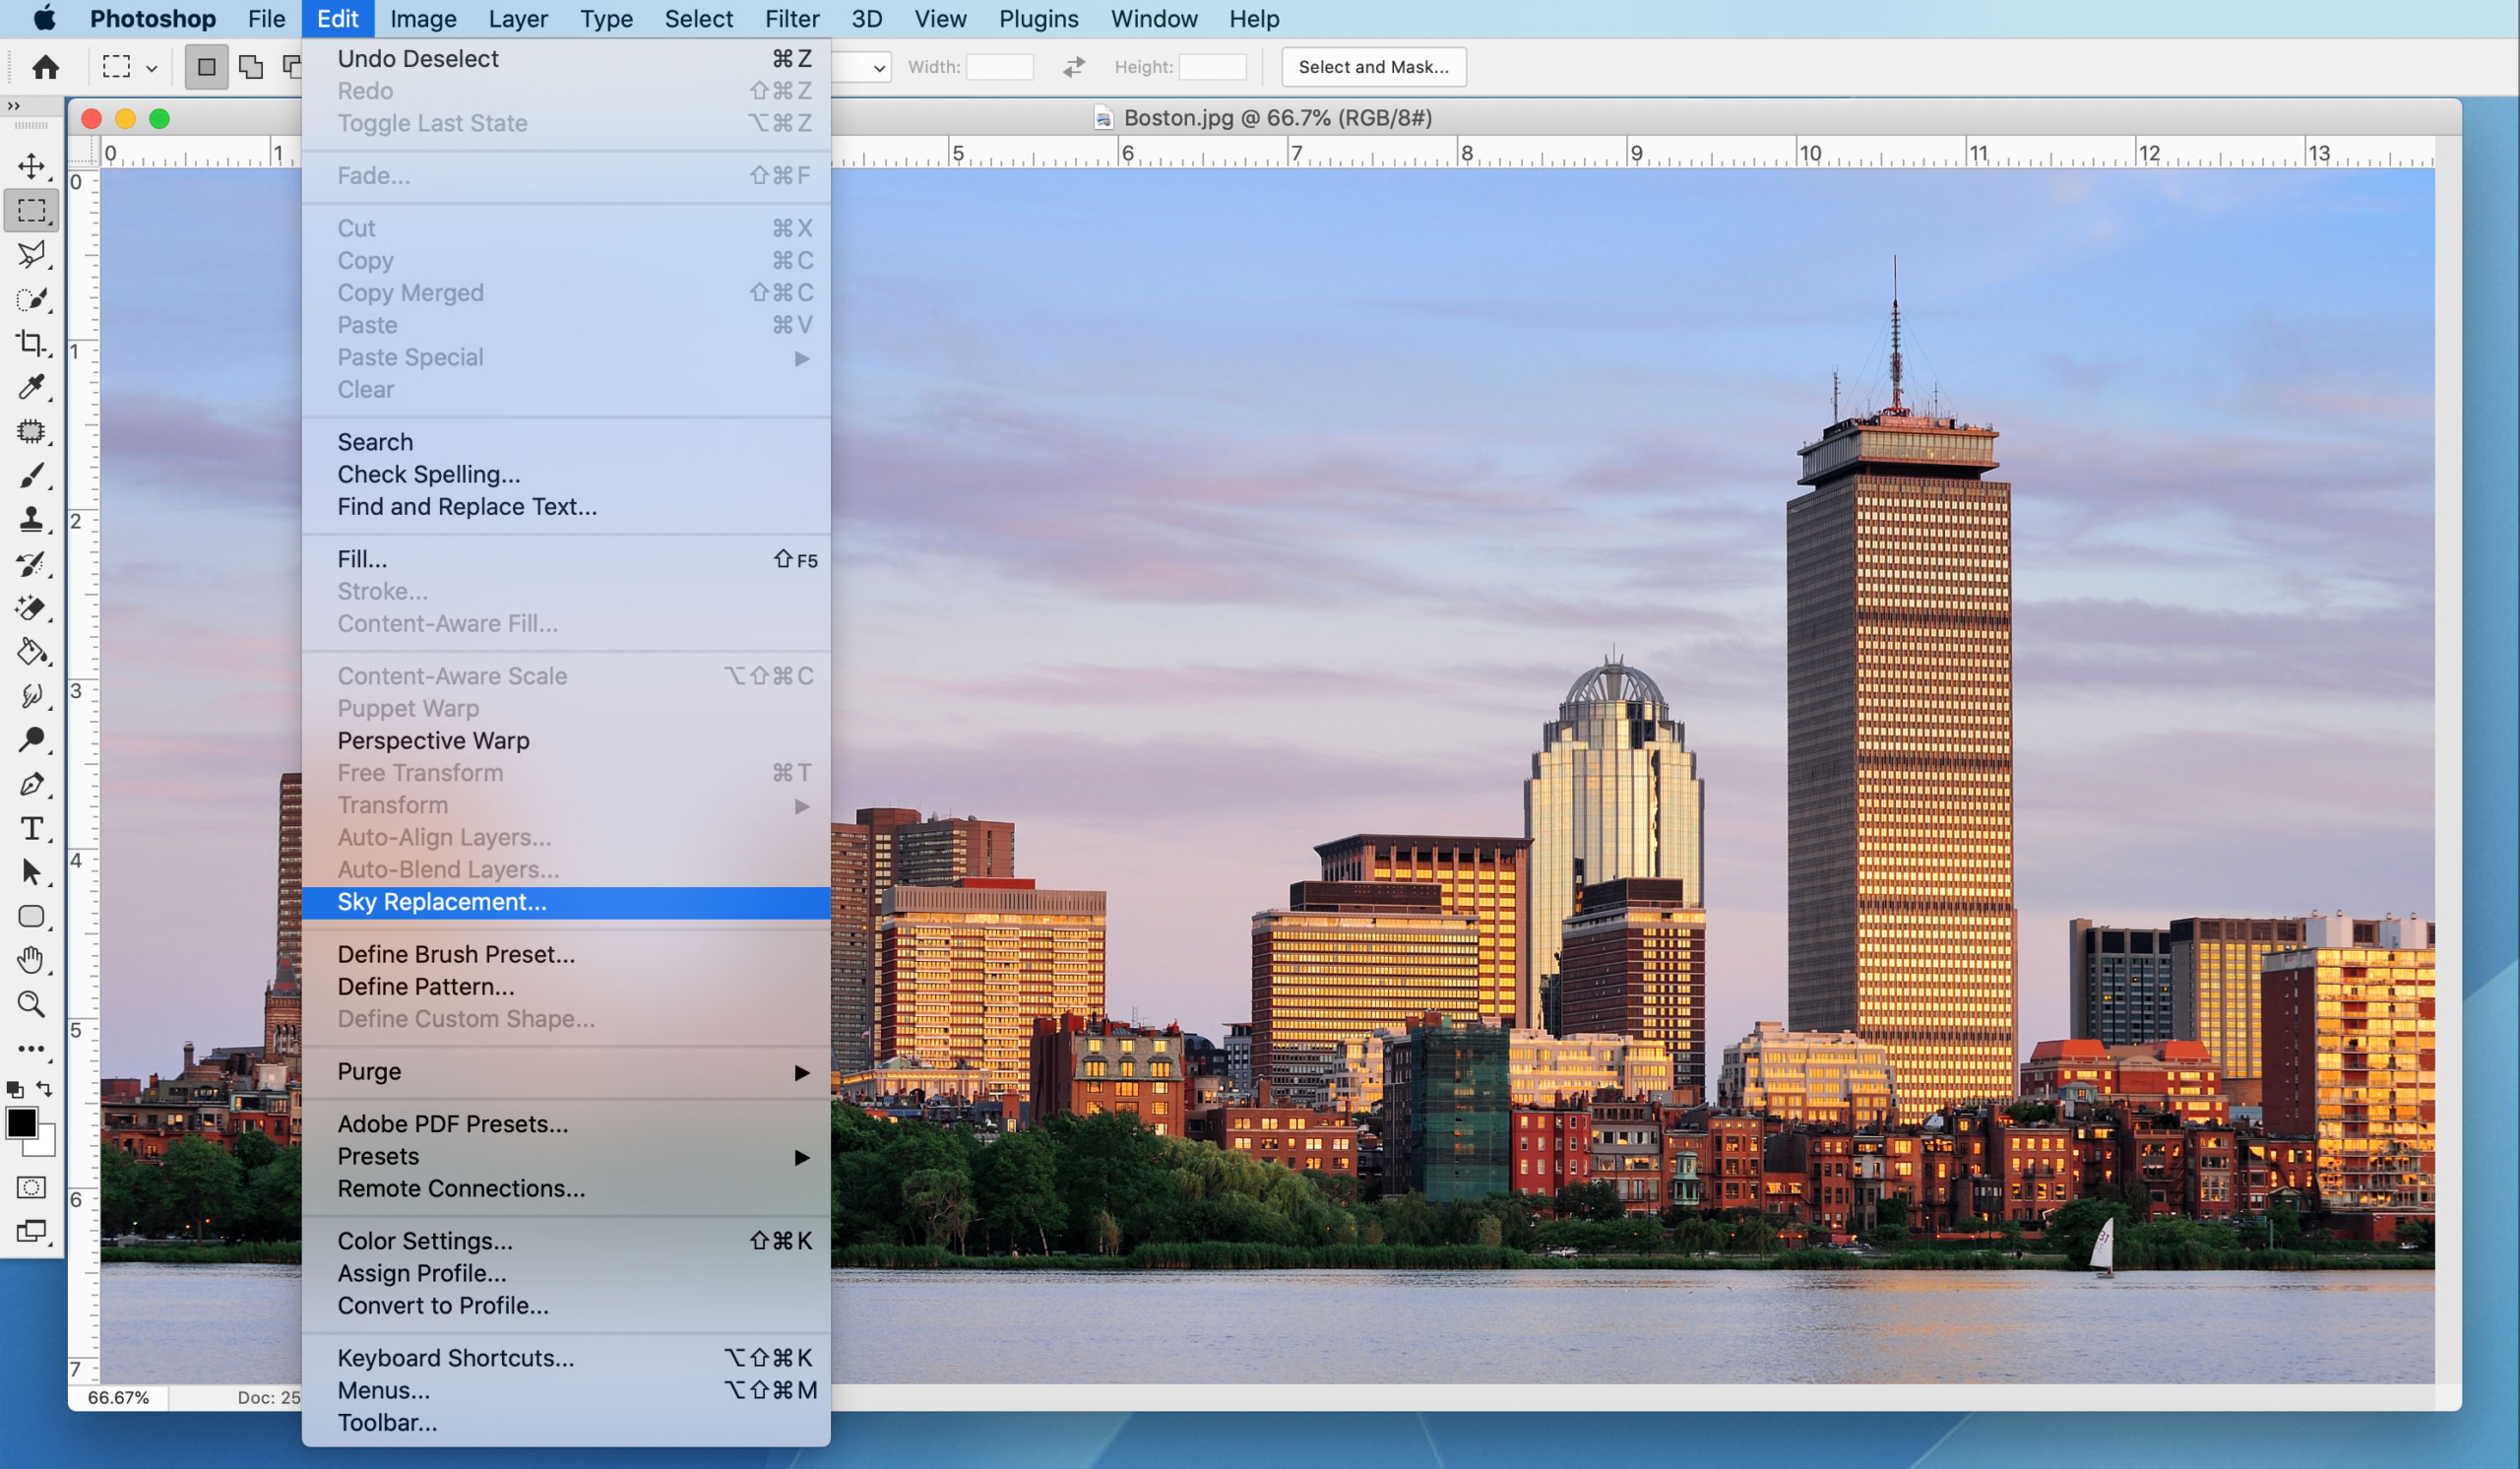
Go to the Edit menu and select the “Sky Replacement…” command:
An interface will pop up, and even assign a replacement sky before you do anything else:
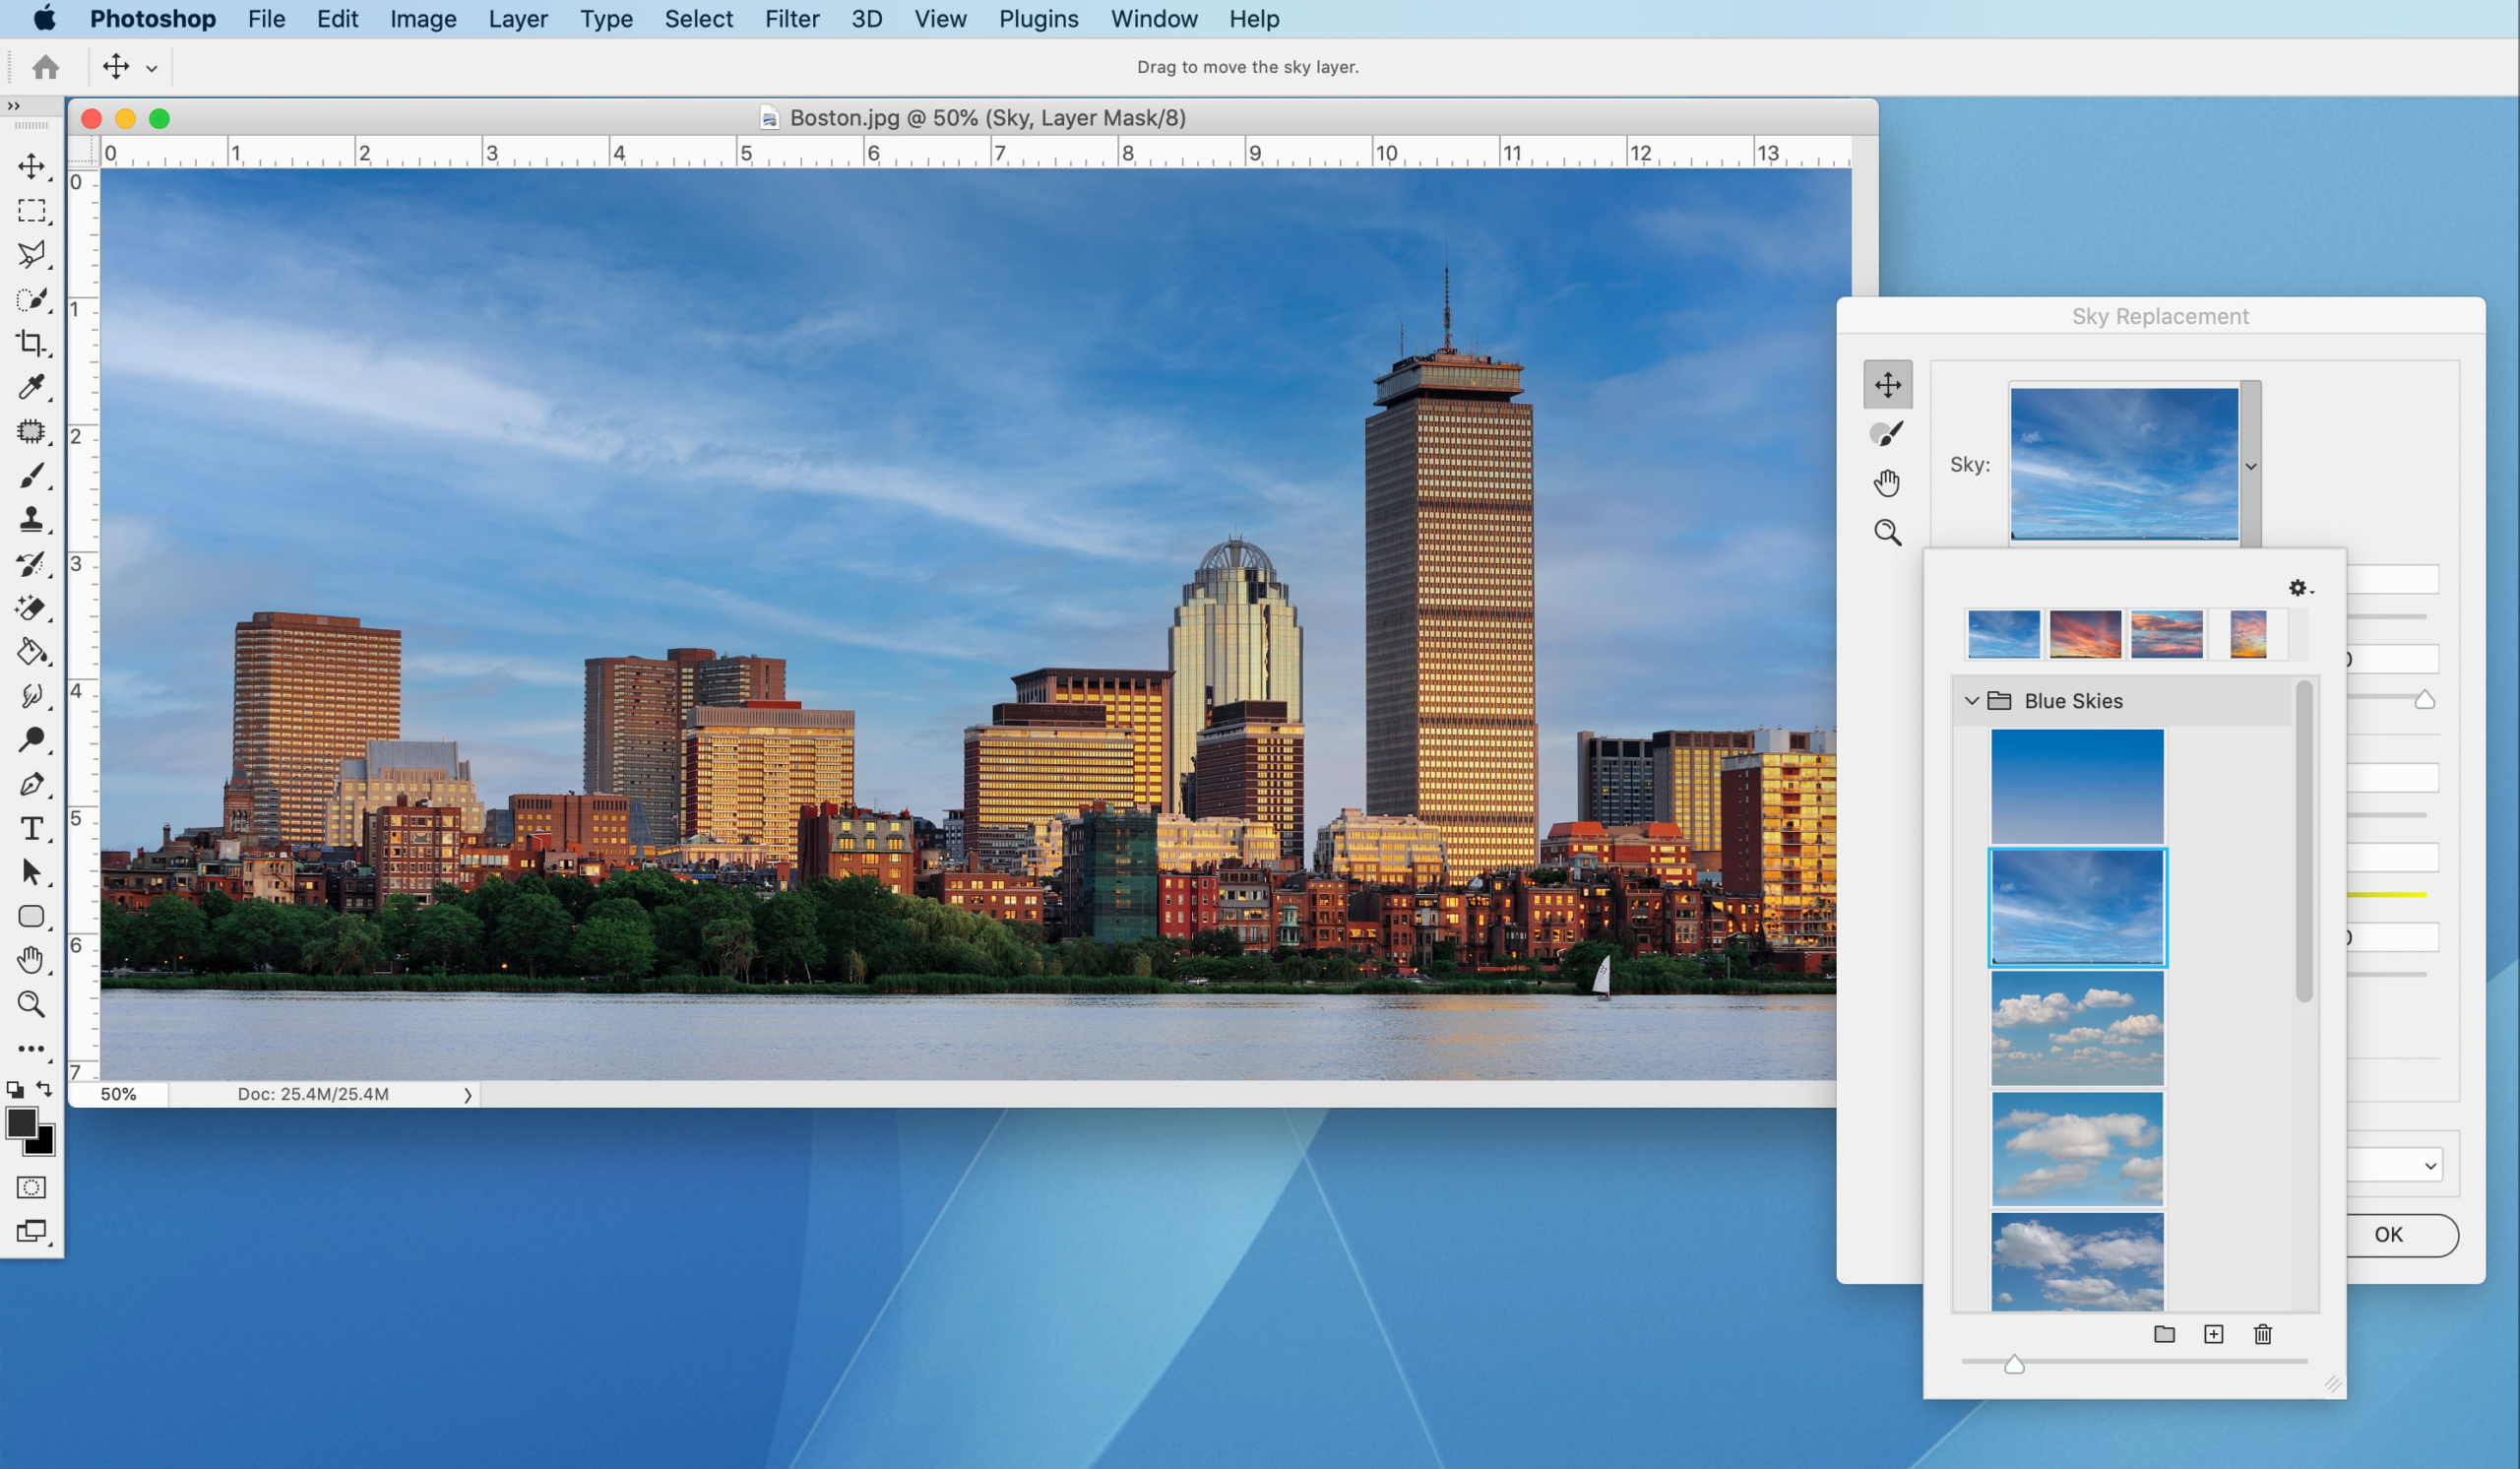
Notice that you didn’t have to make any selections – Photoshop is now smart enough to figure out what is sky and what isn’t. It’s like an advanced version of the “Subject” command I’ve written about previously. It deftly handles things like antennae, tree branches and leaves, flagpoles, and all sorts of things that would be a real pain to manually mask out.
Sky Replacement comes with three folders full of images to choose from: “Blue Skies” (one of which is shown above), “Spectacular,” and “Sunsets.” You can remove or reorganize their contents, or add your own.
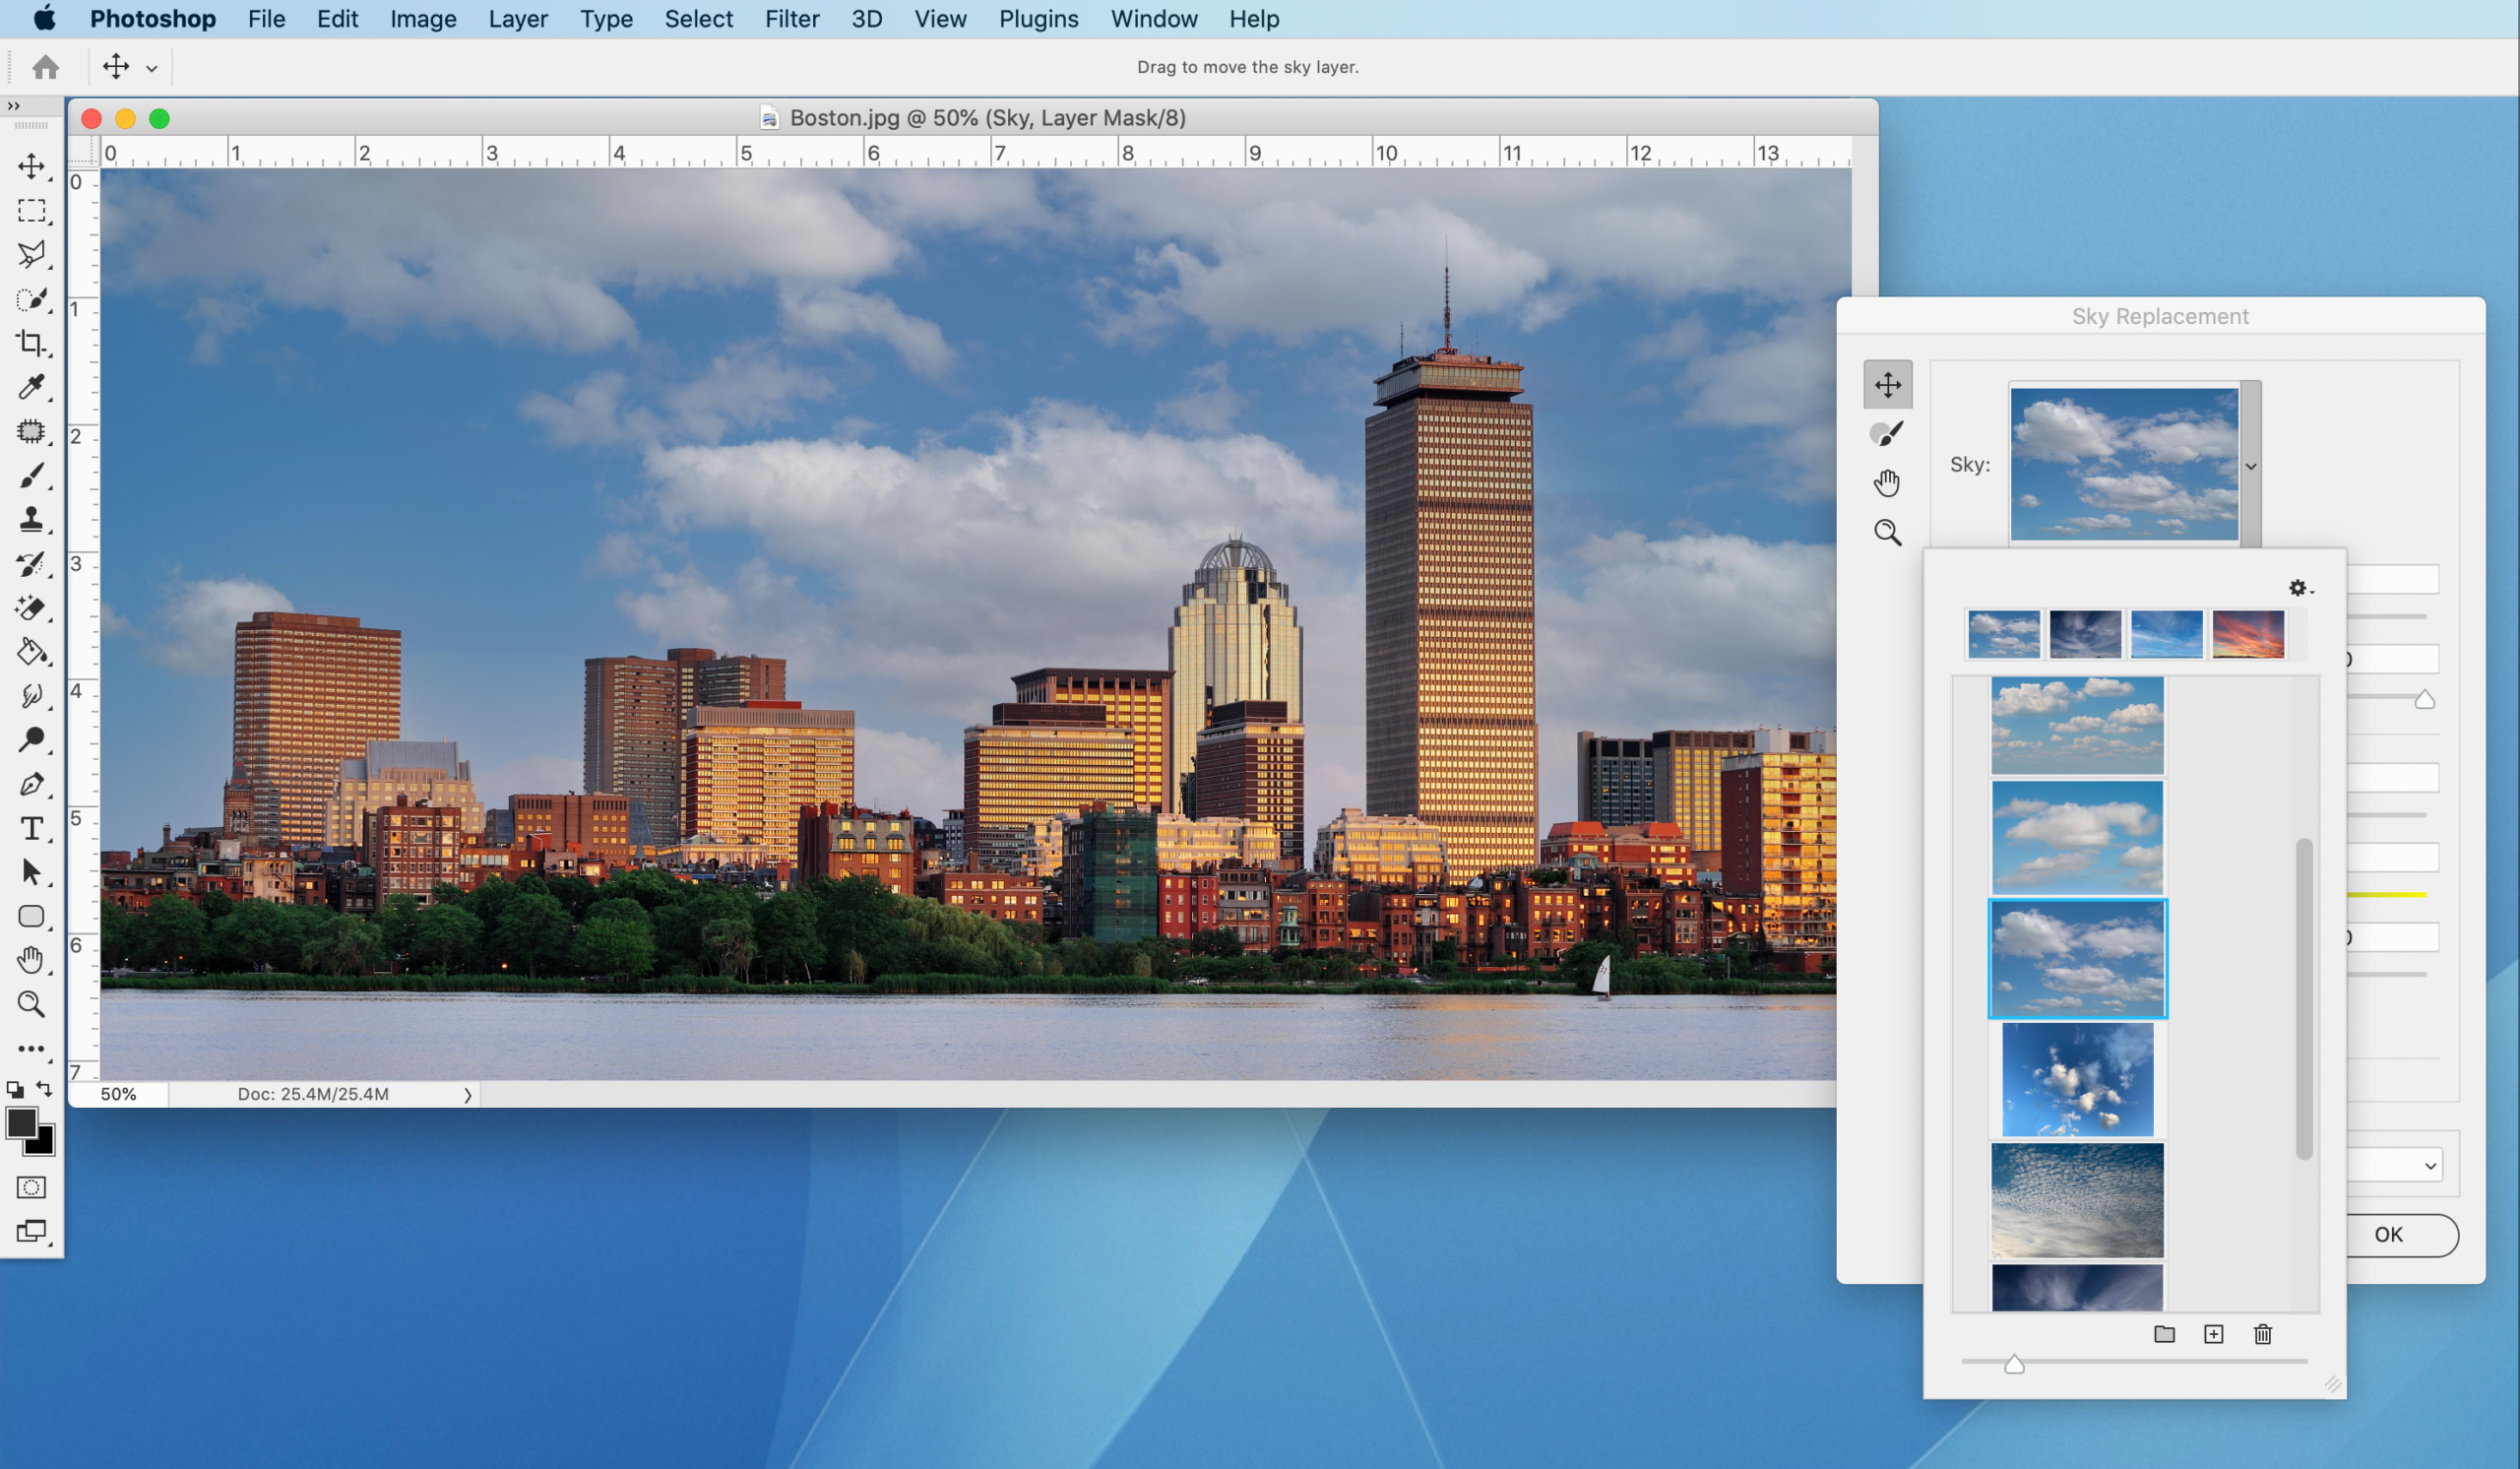
To see what other sky options would look like, simply click any available thumbnail such as one with more clouds…
…or one with a sunset…
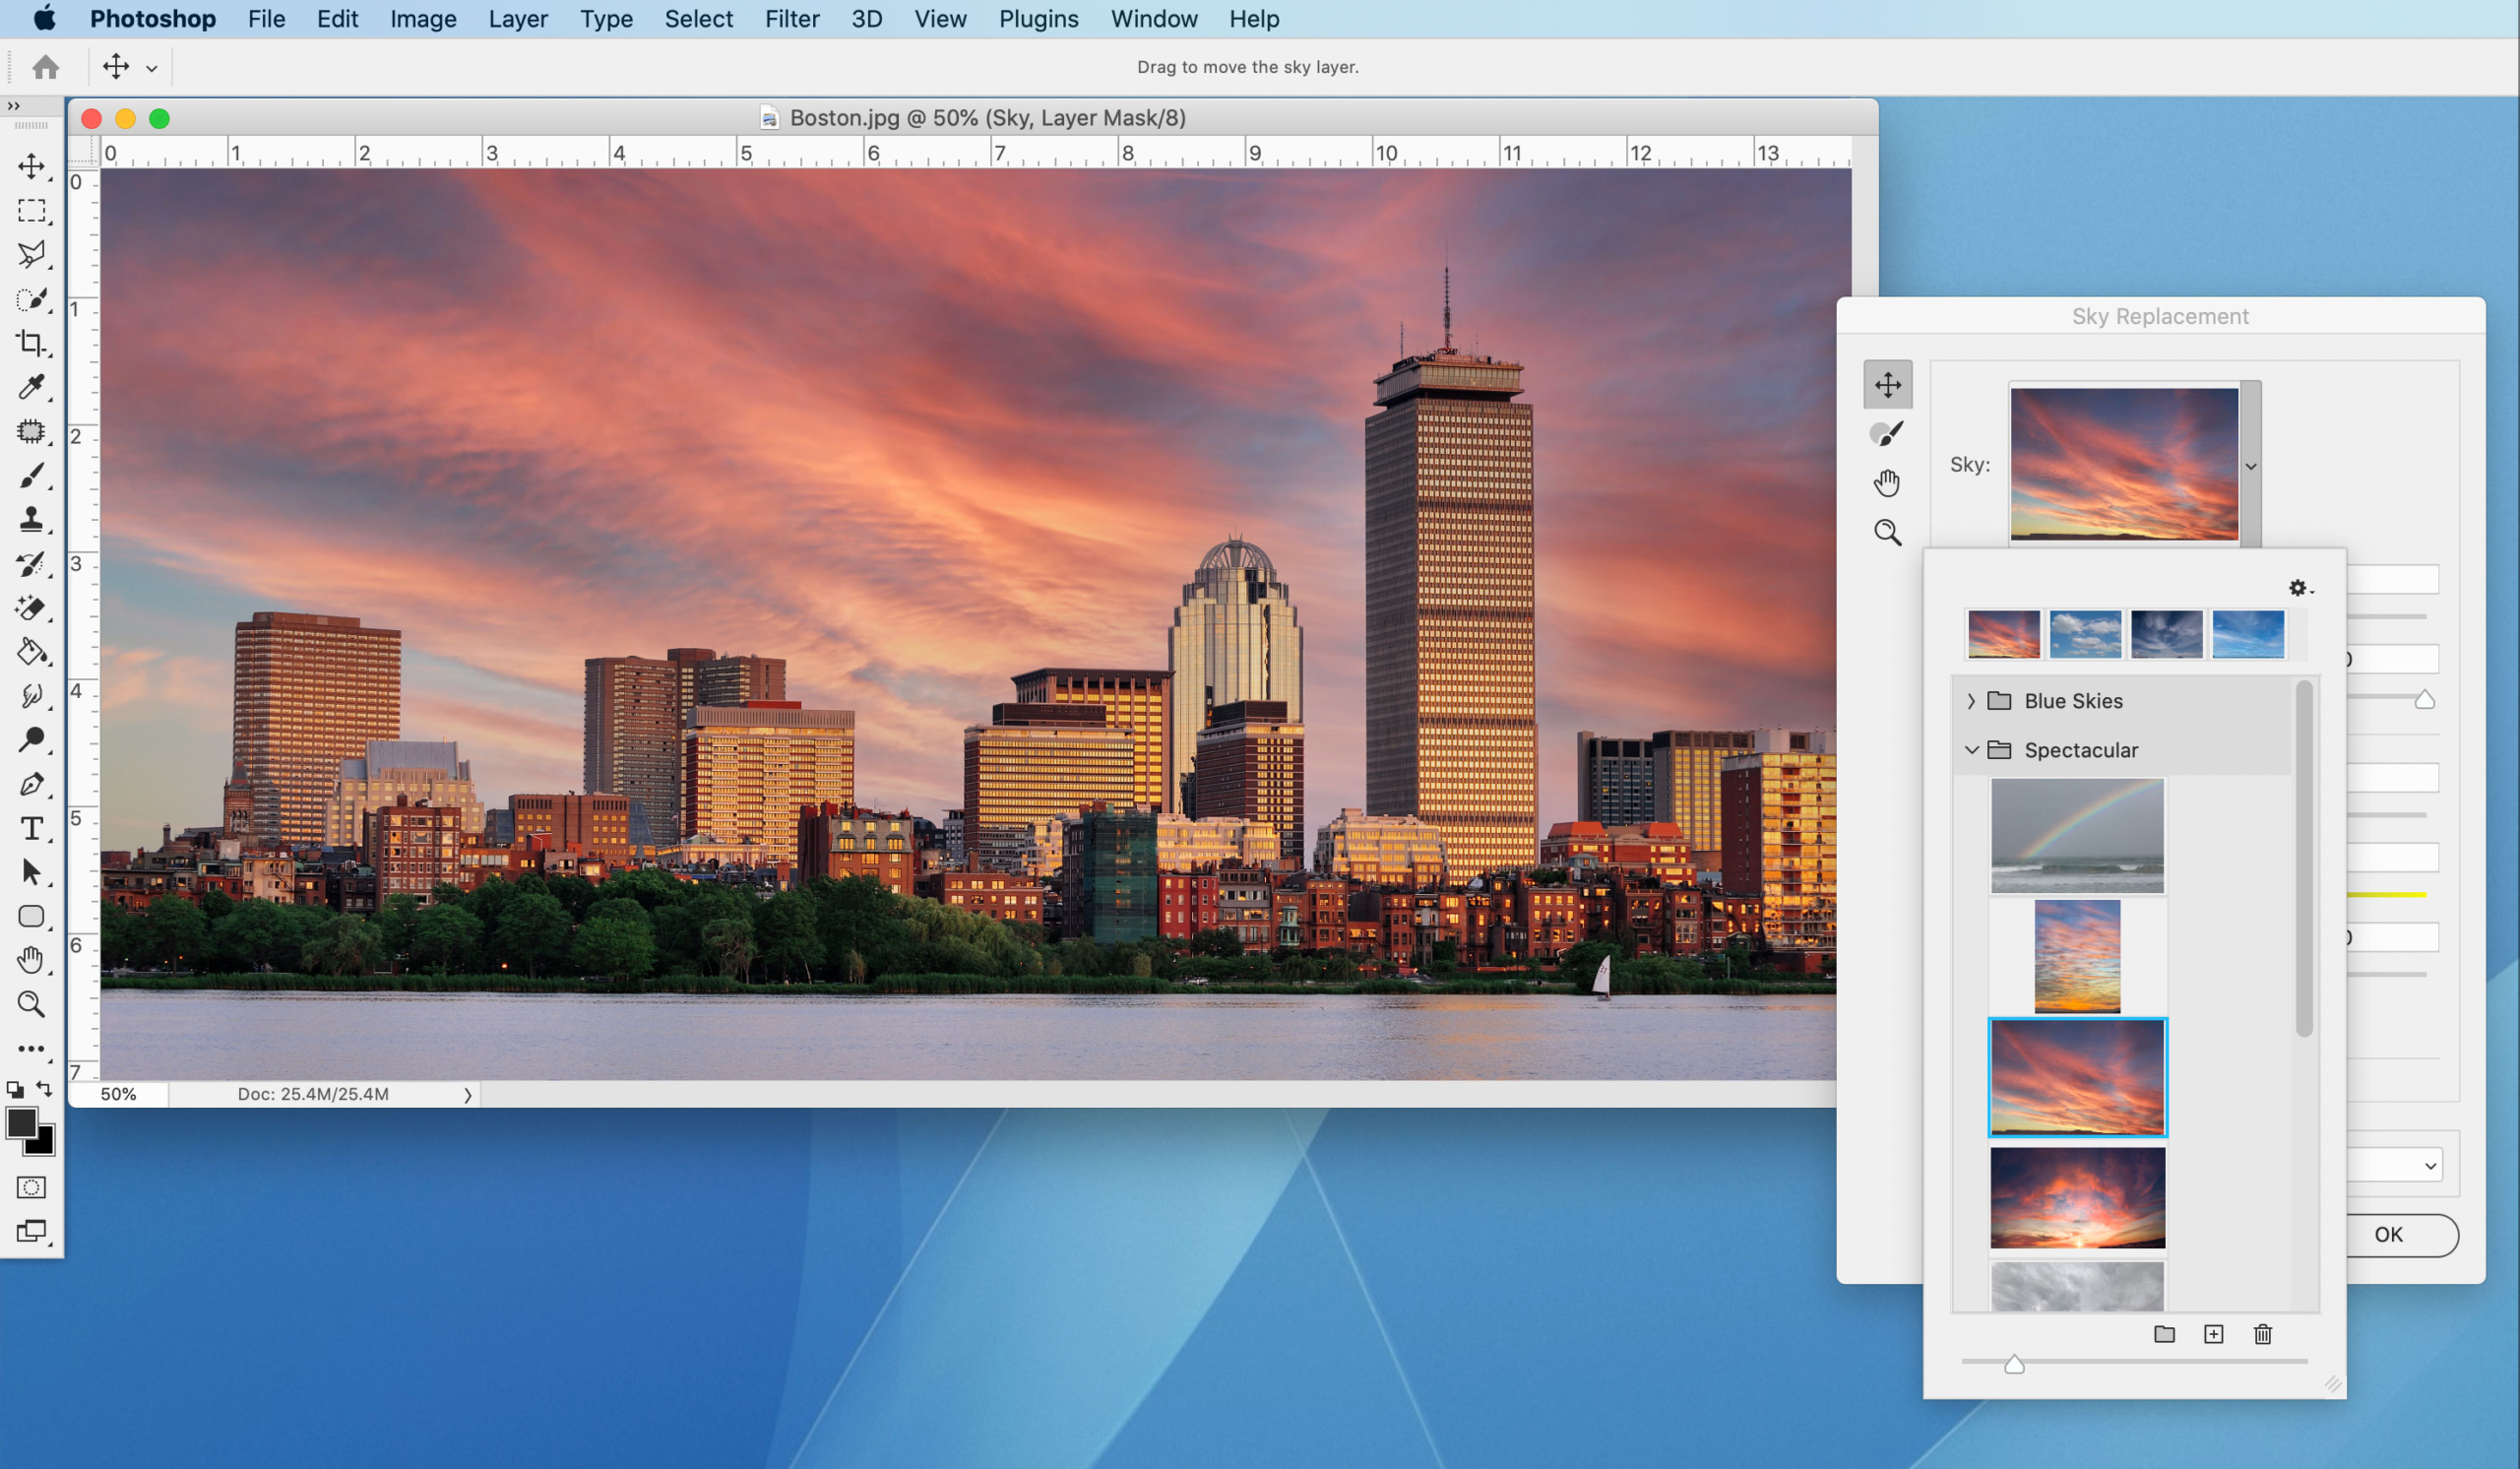
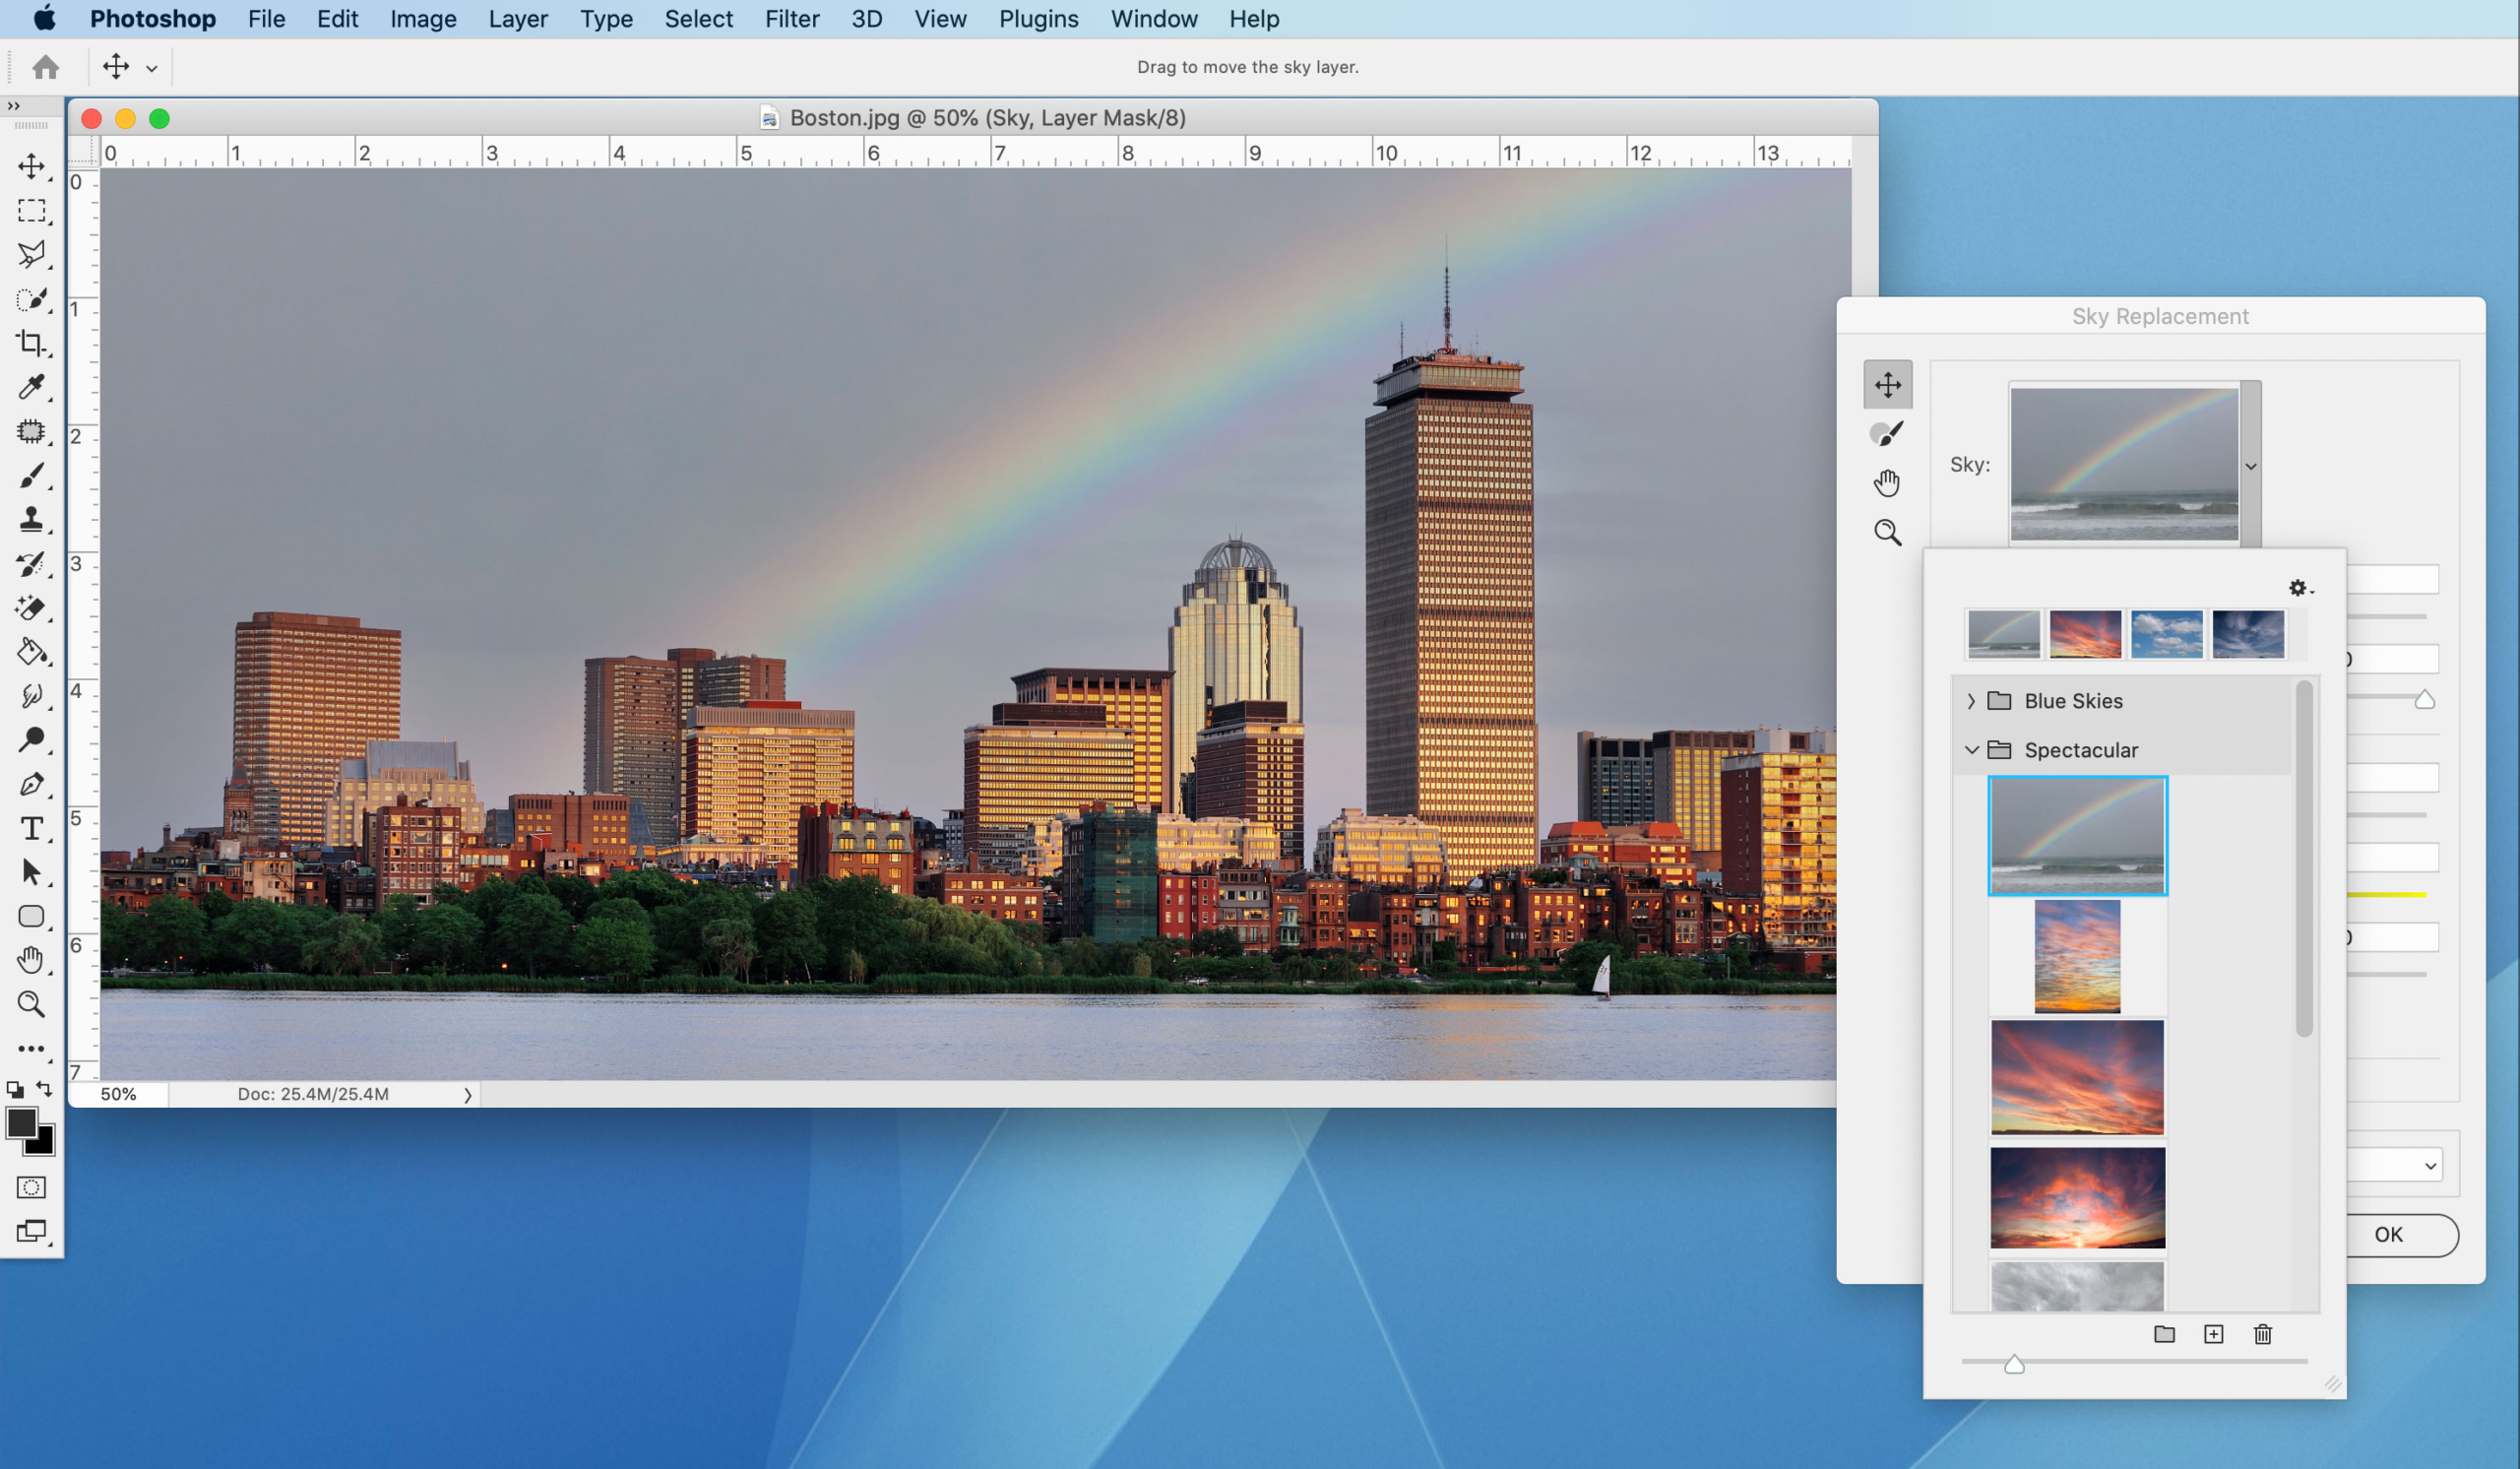
…or even a rainbow!
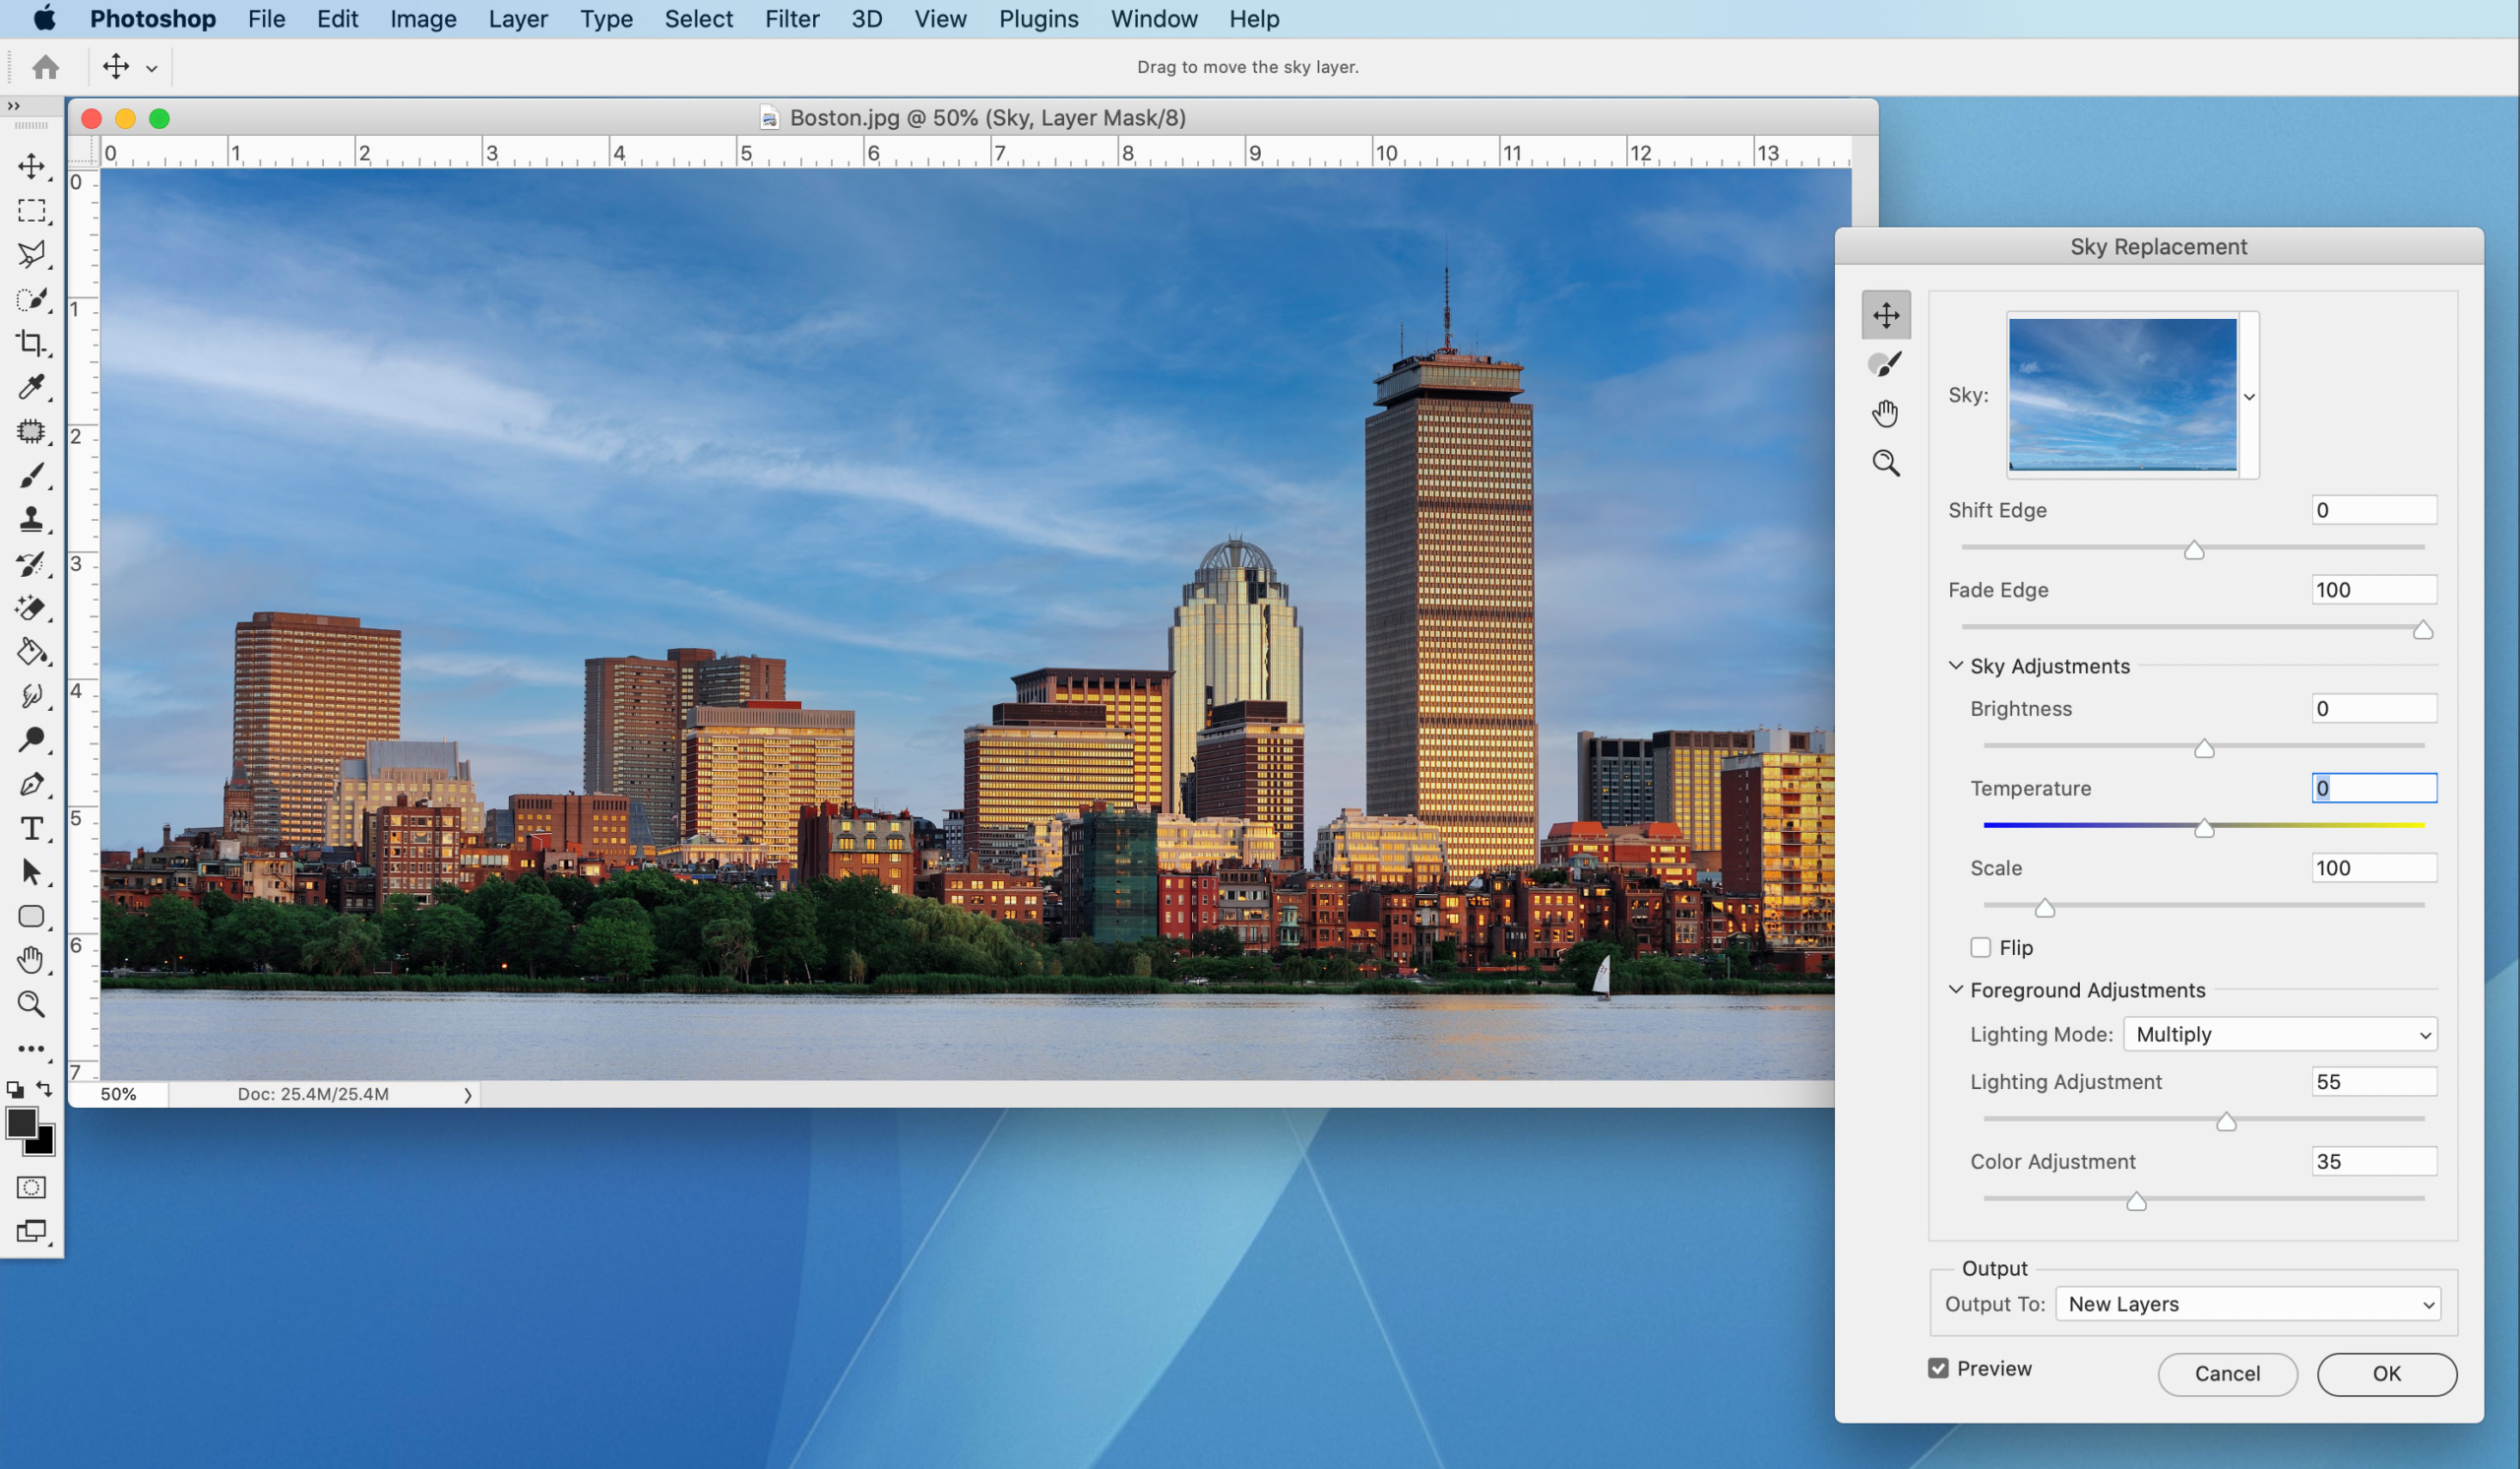
Most of these default sky images work perfectly as-is, but if you find you need to tweak either the replacement sky or the existing foreground, there are a number of useful settings such as Brightness, Scale, and Color Adjustment. You can also use the Move tool to position the sky where you’d like it to be:
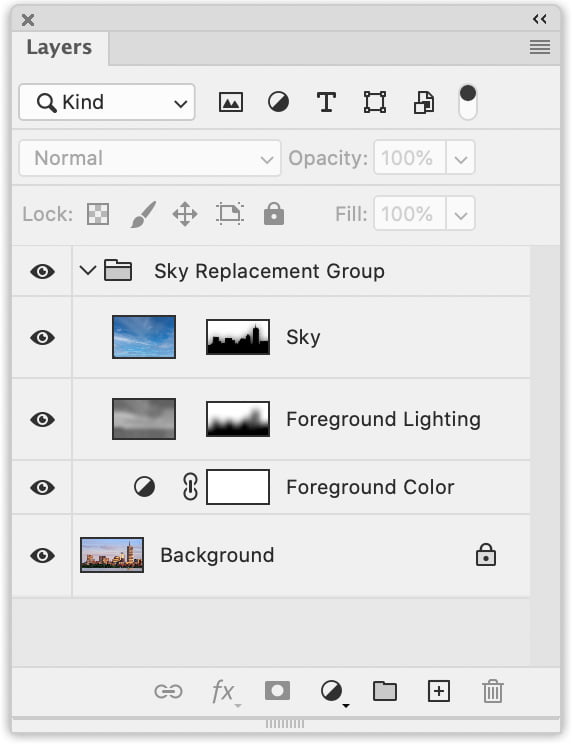
Once you’ve clicked the OK button, you can see in your Layers panel that the changes were non-destructive (i.e. the original image hasn’t been altered.) Furthermore, you can add different skies to your image if necessary – each set of changes is kept in a separate “Sky Replacement Group”:
About The Author