Arrows can help you draw attention to specific details in a proposal, or show which direction to go in an infographic or process flow. Adobe has baked this function right into the line tool in InDesign. In today’s video tutorial, we’re going to show you a simple way to make arrows in InDesign. Follow the step-by-step tutorial below to learn how to make arrowheads in 3 minutes or less.
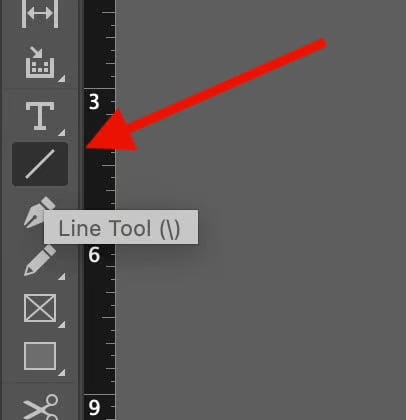
Step 1: Use the Line Tool to create a line
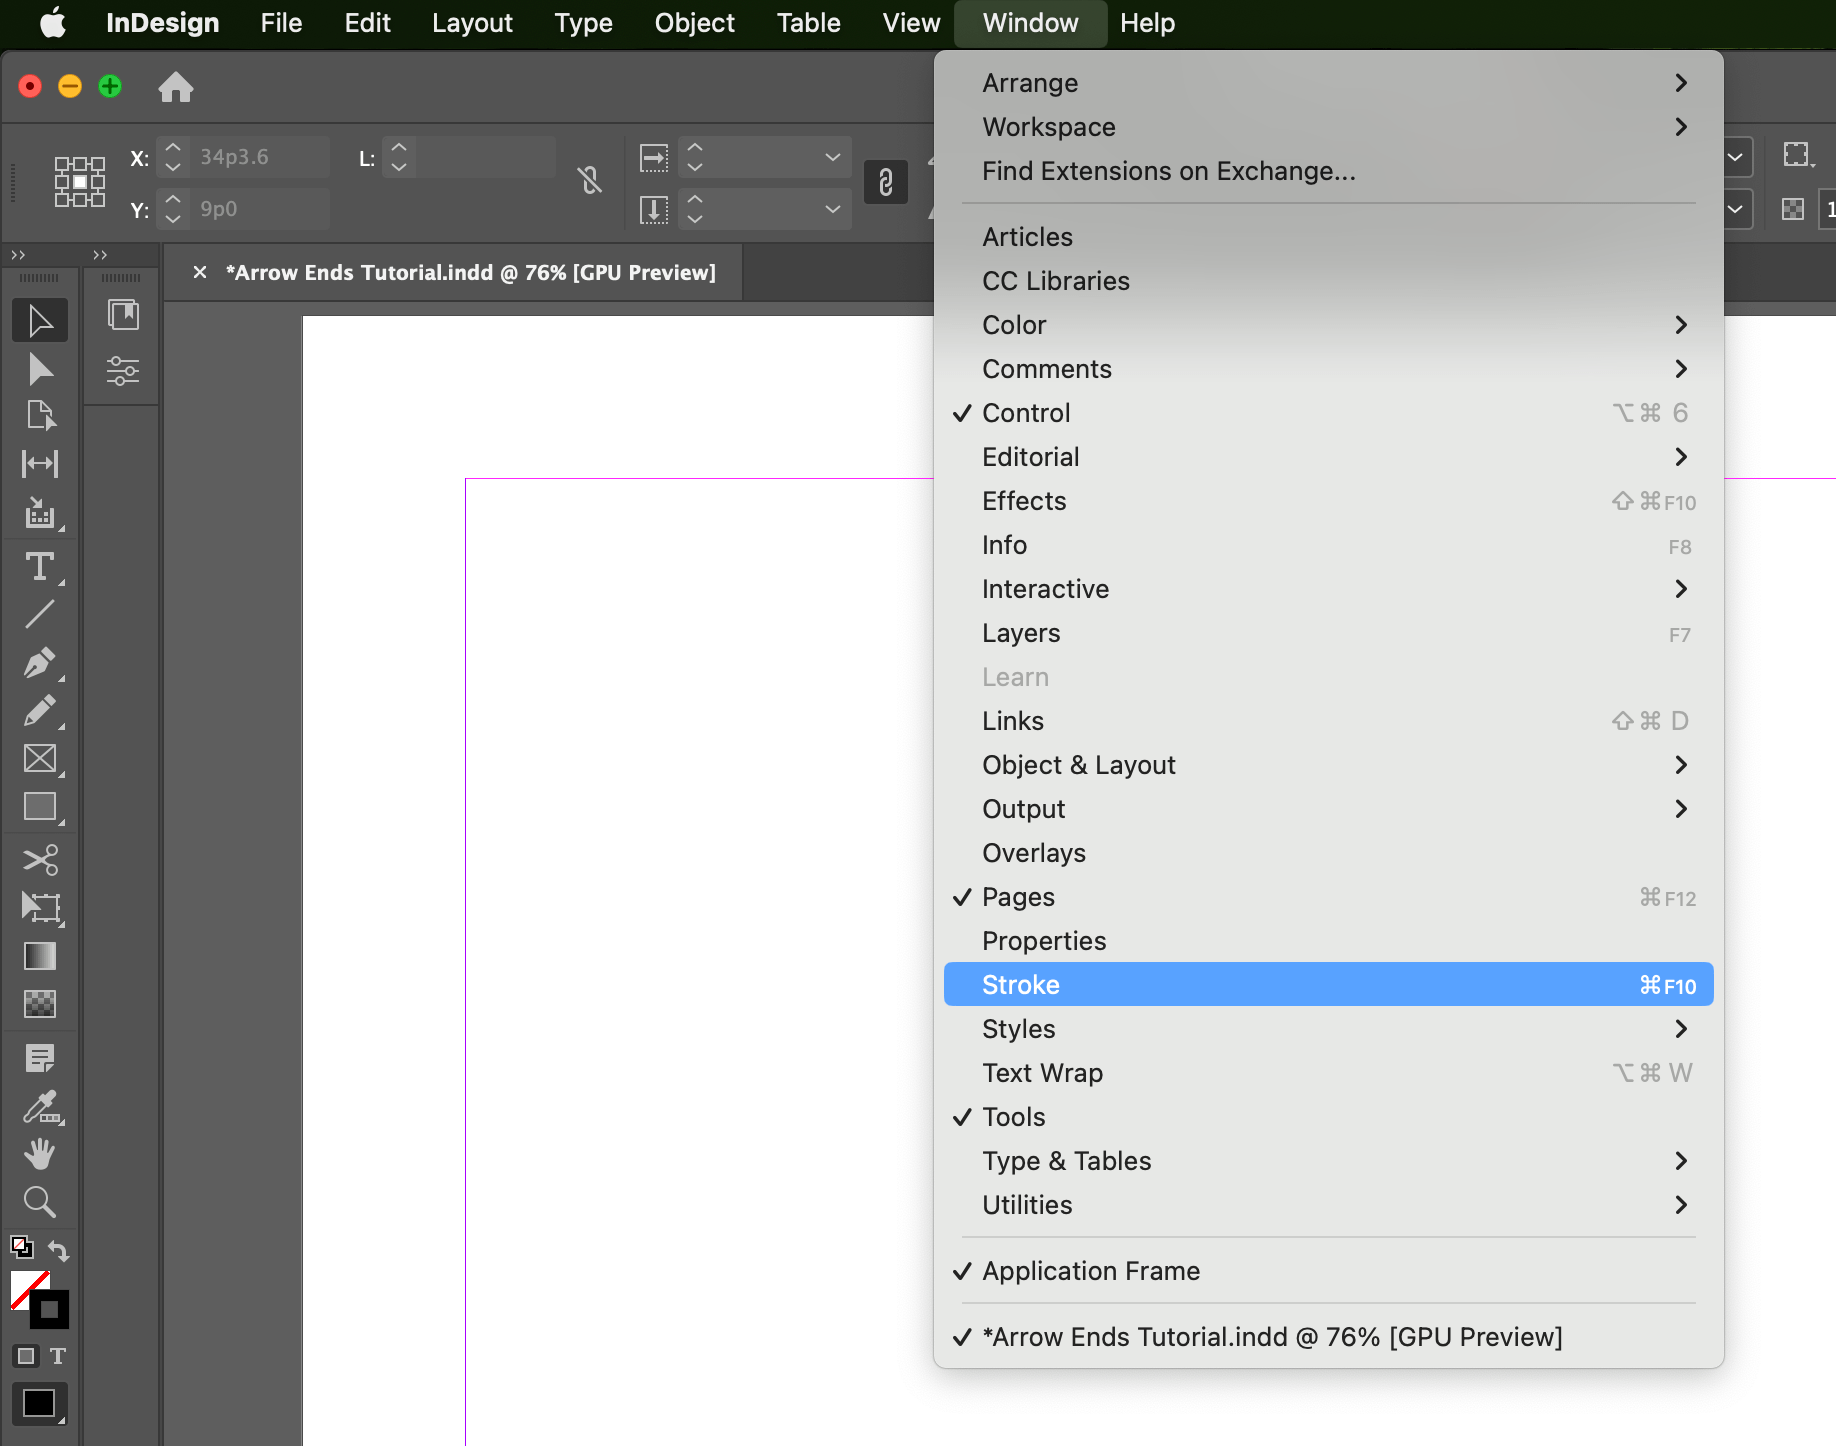
Step 2: Open the Stroke panel (if it’s not already open)
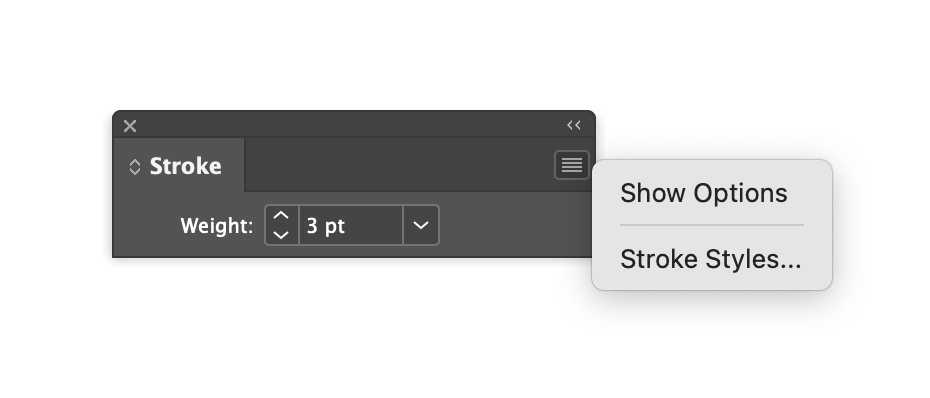
Step 3: In the Stroke panel Show Options
Step 4: Select your line and adjust the Start/End using the drop-down menus
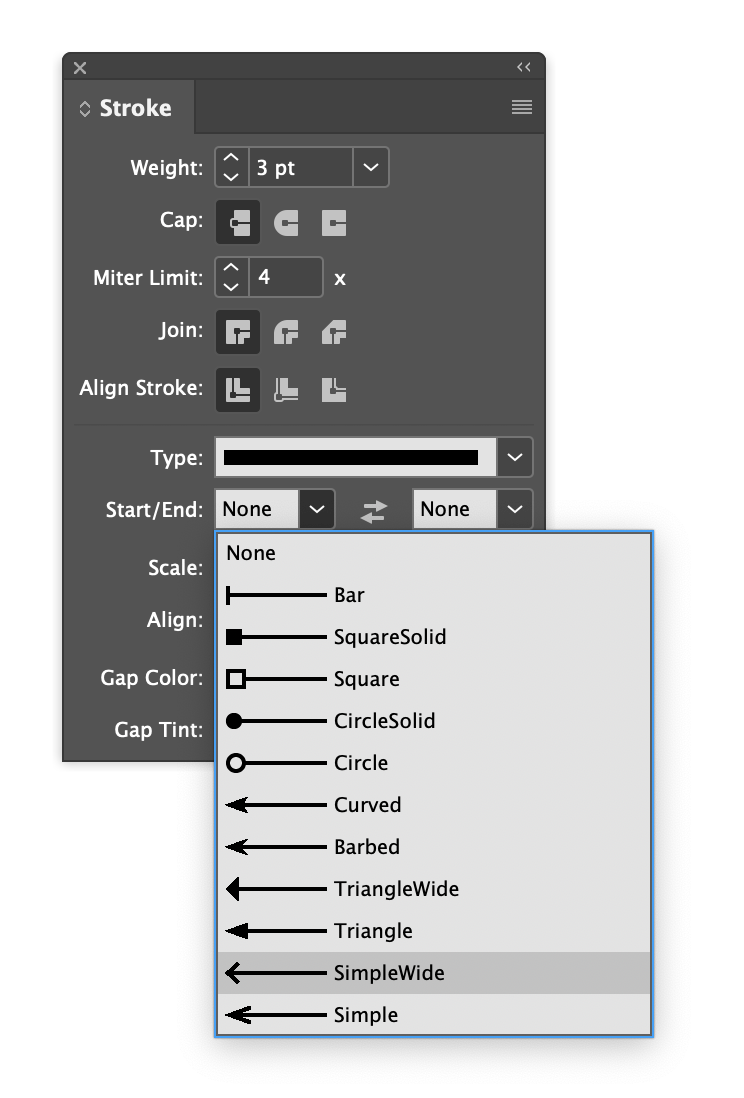
That’s it, now you have an arrow in InDesign!
![]()
If you’d like to continue to learn more tech tips, created specifically for professional service firm marketers using Adobe software, subscribe to our blog or follow us on social media!
About The Author